
Modern Twist on Valentine’s Day
❤️ Modern Twist on Valentine’s Day ❤️
This year for Valentine’s Day, I wanted to add a Modern twist to my decor. I thought it would be fun to try something a little different from the traditional red, pink and hearts but also, still stay true to the holiday’s fun, flirty style. I did a background of black and white, with pops of color using mostly pink and green. Then added lots of unique, easy and creative DIY’s that everyone can do. Also, remember it’s all about the details! If you look careful at all the pictures the final touches really finish off each space! 😉
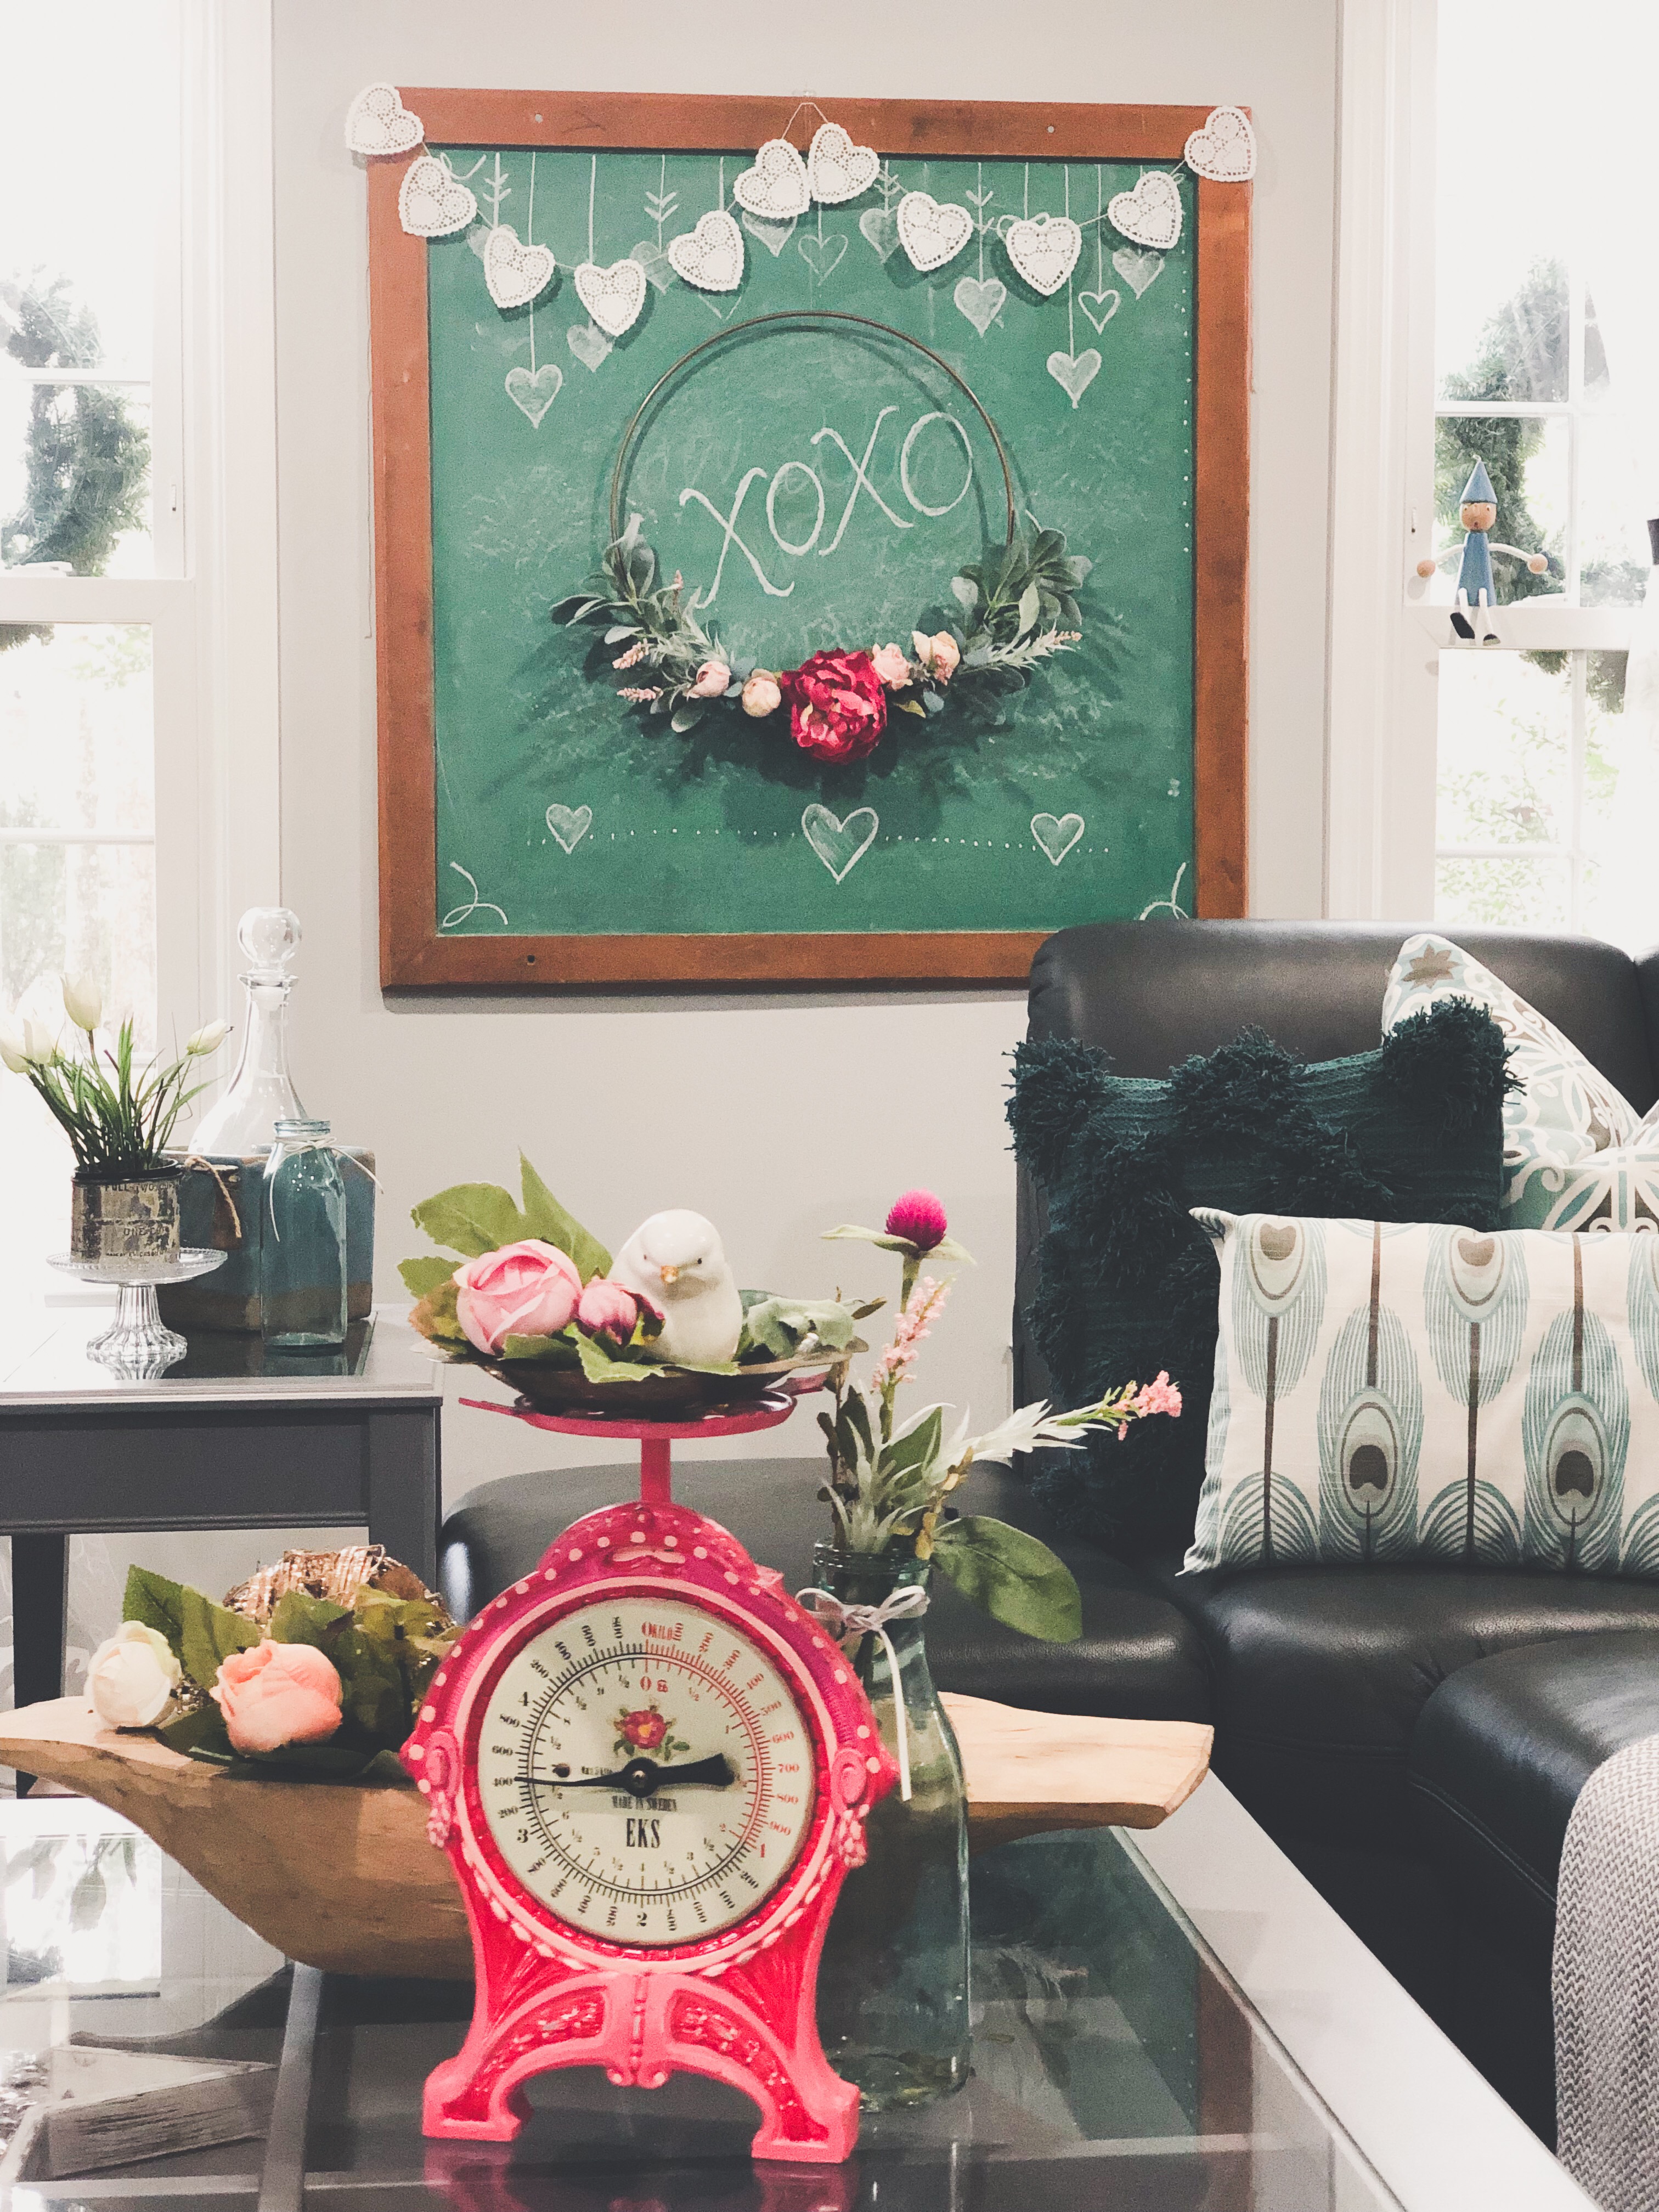
Vintage Chalkboard & Heart Doilies Garland
For my living room, I found this amazing large vintage chalkboard that I am obsessed with. I tried so many different things with it, but I have come to terms that my Chalkboard drawing and writing skills are extremely limited! So I decided to stick to something simple and that I am good at, so I added my favorite go-to DIY decor focal point, a DIY Scandinavian Wreath. If you missed these before, I did a whole tutorial on them during Christmas time. These guys are all over my house right now and I can’t get enough of them. I mentioned before that they are perfect for all year round…for this one I added lamb ear, eucalyptus and soft pink florals for a pop of pink. Fun, simple and cute! I just added a XOXO in the center to balance out the space of the chalkboard and tie it in with my DIY XOXO Tablecloth.


For the top of the chalkboard I also added a DIY Heart Doily Garland. A great cheap and easy DIY Valentine’s Day Decor. All you need for this is Heart Doilies and Twine. I used the mini heart doilies, but you can use any size for this craft. I strung my twine through the top holes of the hearts and spaced them out about 2 inches from one another. It added the perfect touch to the space.


XOXO DIY Tablecloth
This DIY decor turned out soooooo cute and it is beyond easy and inexpensive. Seriously… anyone can do this DIY…I promise! 😉 Super simple all you need is black acrylic paint and brown or white easel or craft paper. Just lay your paper on a flat surface, I used my dining room table and put paper towels down along the sides so I didn’t get paint on my table. 😉 Next just start painting X’s & O’s with your black paint. I painted mine on an angle going across, but you can put them anywhere you want, I wanted a little more uniformed look. This is also a great craft to include the kids in decorating. My girls thought this was so fun! Let the paint dry before you put anything on it. That’s it! This table runner really helped tie in all my decor. To finish it off, I layered another table runner underneath, my new favorite thing to do, to add texture and a little more dimension to the space.


To finish decorating the table, I used my favorite Polish Pottery dishes which have hearts and arrows on them so they are perfect for Valentine’s Day. I added greenery and florals to the centerpiece area along with Vintage Milk Bottles. I also filled my DIY Pallet Shelves with tons of florals.


DIY Framed Scandinavian Wreaths
For my sitting room I want to give my mantle and fireplace a new look for Valentine’s Day. I have been using all neutral colors lately in this space, which I still love but in the spirit of the holiday I added a bright fun pop of color. Bright pink was used as my accent color in all of my wreaths and throughout the space. I actually found these frames in the trash… whhhhaaattt? I thought they were super cool and instantly fell in love with them. What’s it that they say, One Man’s Trash is Another Man’s Treasure! Well in this case one Woman’s Treasure…and there was 3, my favorite number to decorate with. You can look at my blog post on DIY Scandinavian Wreath’s here.


DIY Bunting Banner
This banner is super easy and can actually used for any holiday or birthday. I used a template to cut each triangle, it’s a lot quicker then measuring each one. I used bias tape that was pre-folded and spaced each flag out 2″ away from each other and pinned them in-between the bias tape. If you don’t like to sew, you can always glue your flags into place as well. I used my sewing machine and did one straight stitch down the bias tape making sure each flag was secure. Next I used my Cricut to cut out my Buffalo Plaid Hearts. Before, I cut them I added Iron-On Bonding fabric so when they were cut I could just iron them onto my Burlap and not have to sew each one. Also, I just got my Cricut… you can cut these out by hand with a template which I had been doing for many many years. Not the easiest way, but it gets the job done! 😉 I did this banner reversible… on the back I have a more vintage colored hearts which I loved last year. So we will see what will happen next year!


Entryway
For my Entryway I changed things around a little, but decided to keep up my Scandinavian Wreaths. For the wreaths I switched out the Winter florals to more Spring florals. I found something to do with all my books after doing the KonMari Method. Before I said I had one book to go through, lol… but I actually had more!! 😉 Most of them were Vintage books, but I didn’t have enough to finish my styling decor so I got a bunch at the thrift store for .49 cents. I flipped all the books around to have a more neutral look. Also I added these new lamps which was another amazing find I found at the FarmHouse Auction I went to awhile back. They were $1 for both…So crazy!!!! I am still on the fence on whether or not I should paint them a little bit. I added new lamp shades and used my new favorite color black for a great accent color.


A Few Extra Spaces Throughout the House
These are my favorite DIY Bathroom Shelves. You can check out all the details on our blog post here, they are made from Vintage Cigar Molds I got while living in Germany. They are styled for Valentine’s Day with simple pale Peonies, a few hearts and a small LOVE scrabble board.

This Vintage High Chair is one of my favorite things, it belonged to my Grandmother and she used it for all her kids and I have pictures of me in a baby sitting in it…I love it so much!! It has another Scrabble board on it as well. I am currently working on a larger scale DIY Scrabble board for the mantle for next week… so stay tuned!


Happy Early Valentine’s Day and Happy Styling!!
We would love to see your favorite Valentine’s Day Decorations!
Related Products:
This post contains affiliate links. As always, all opinions are our own. Shopping affiliated links helps support our small brand at no additional cost to you, we appreciate the love. For more information, please see our privacy policy. Thank you!
About The Author
Jessie
Related Posts

DIY Leather Pulls with Cricut
This post is in partnership with Cricut, a company I love. All opinions here are…
June 18, 2021
Creating with Sugru
This post is sponsored with thanks to Sugru, but all thoughts and opinions like always…
December 2, 2020