
Pallet Bookshelves
 Pallet projects are one of my favorites!! There are so many options and ideas out there for pallets these days. I can’t get enough and what makes them even better…they are FREE! Who doesn’t love free projects!!! I wanted to make shelves for my kids playroom to hold all of their books. Anything that can store some of their stuff and not have it laying all over the floor is always a win in my house. I used a few pallets I had left from when my floors were delivered. You can always go to your local hardware store and ask if they have any extra as well. I’m not very good at asking for things so having them delivered to my house was a bonus. It all depends on the size of your pallet on how many shelves you can make. I was able to make two bookshelves using only one pallet.
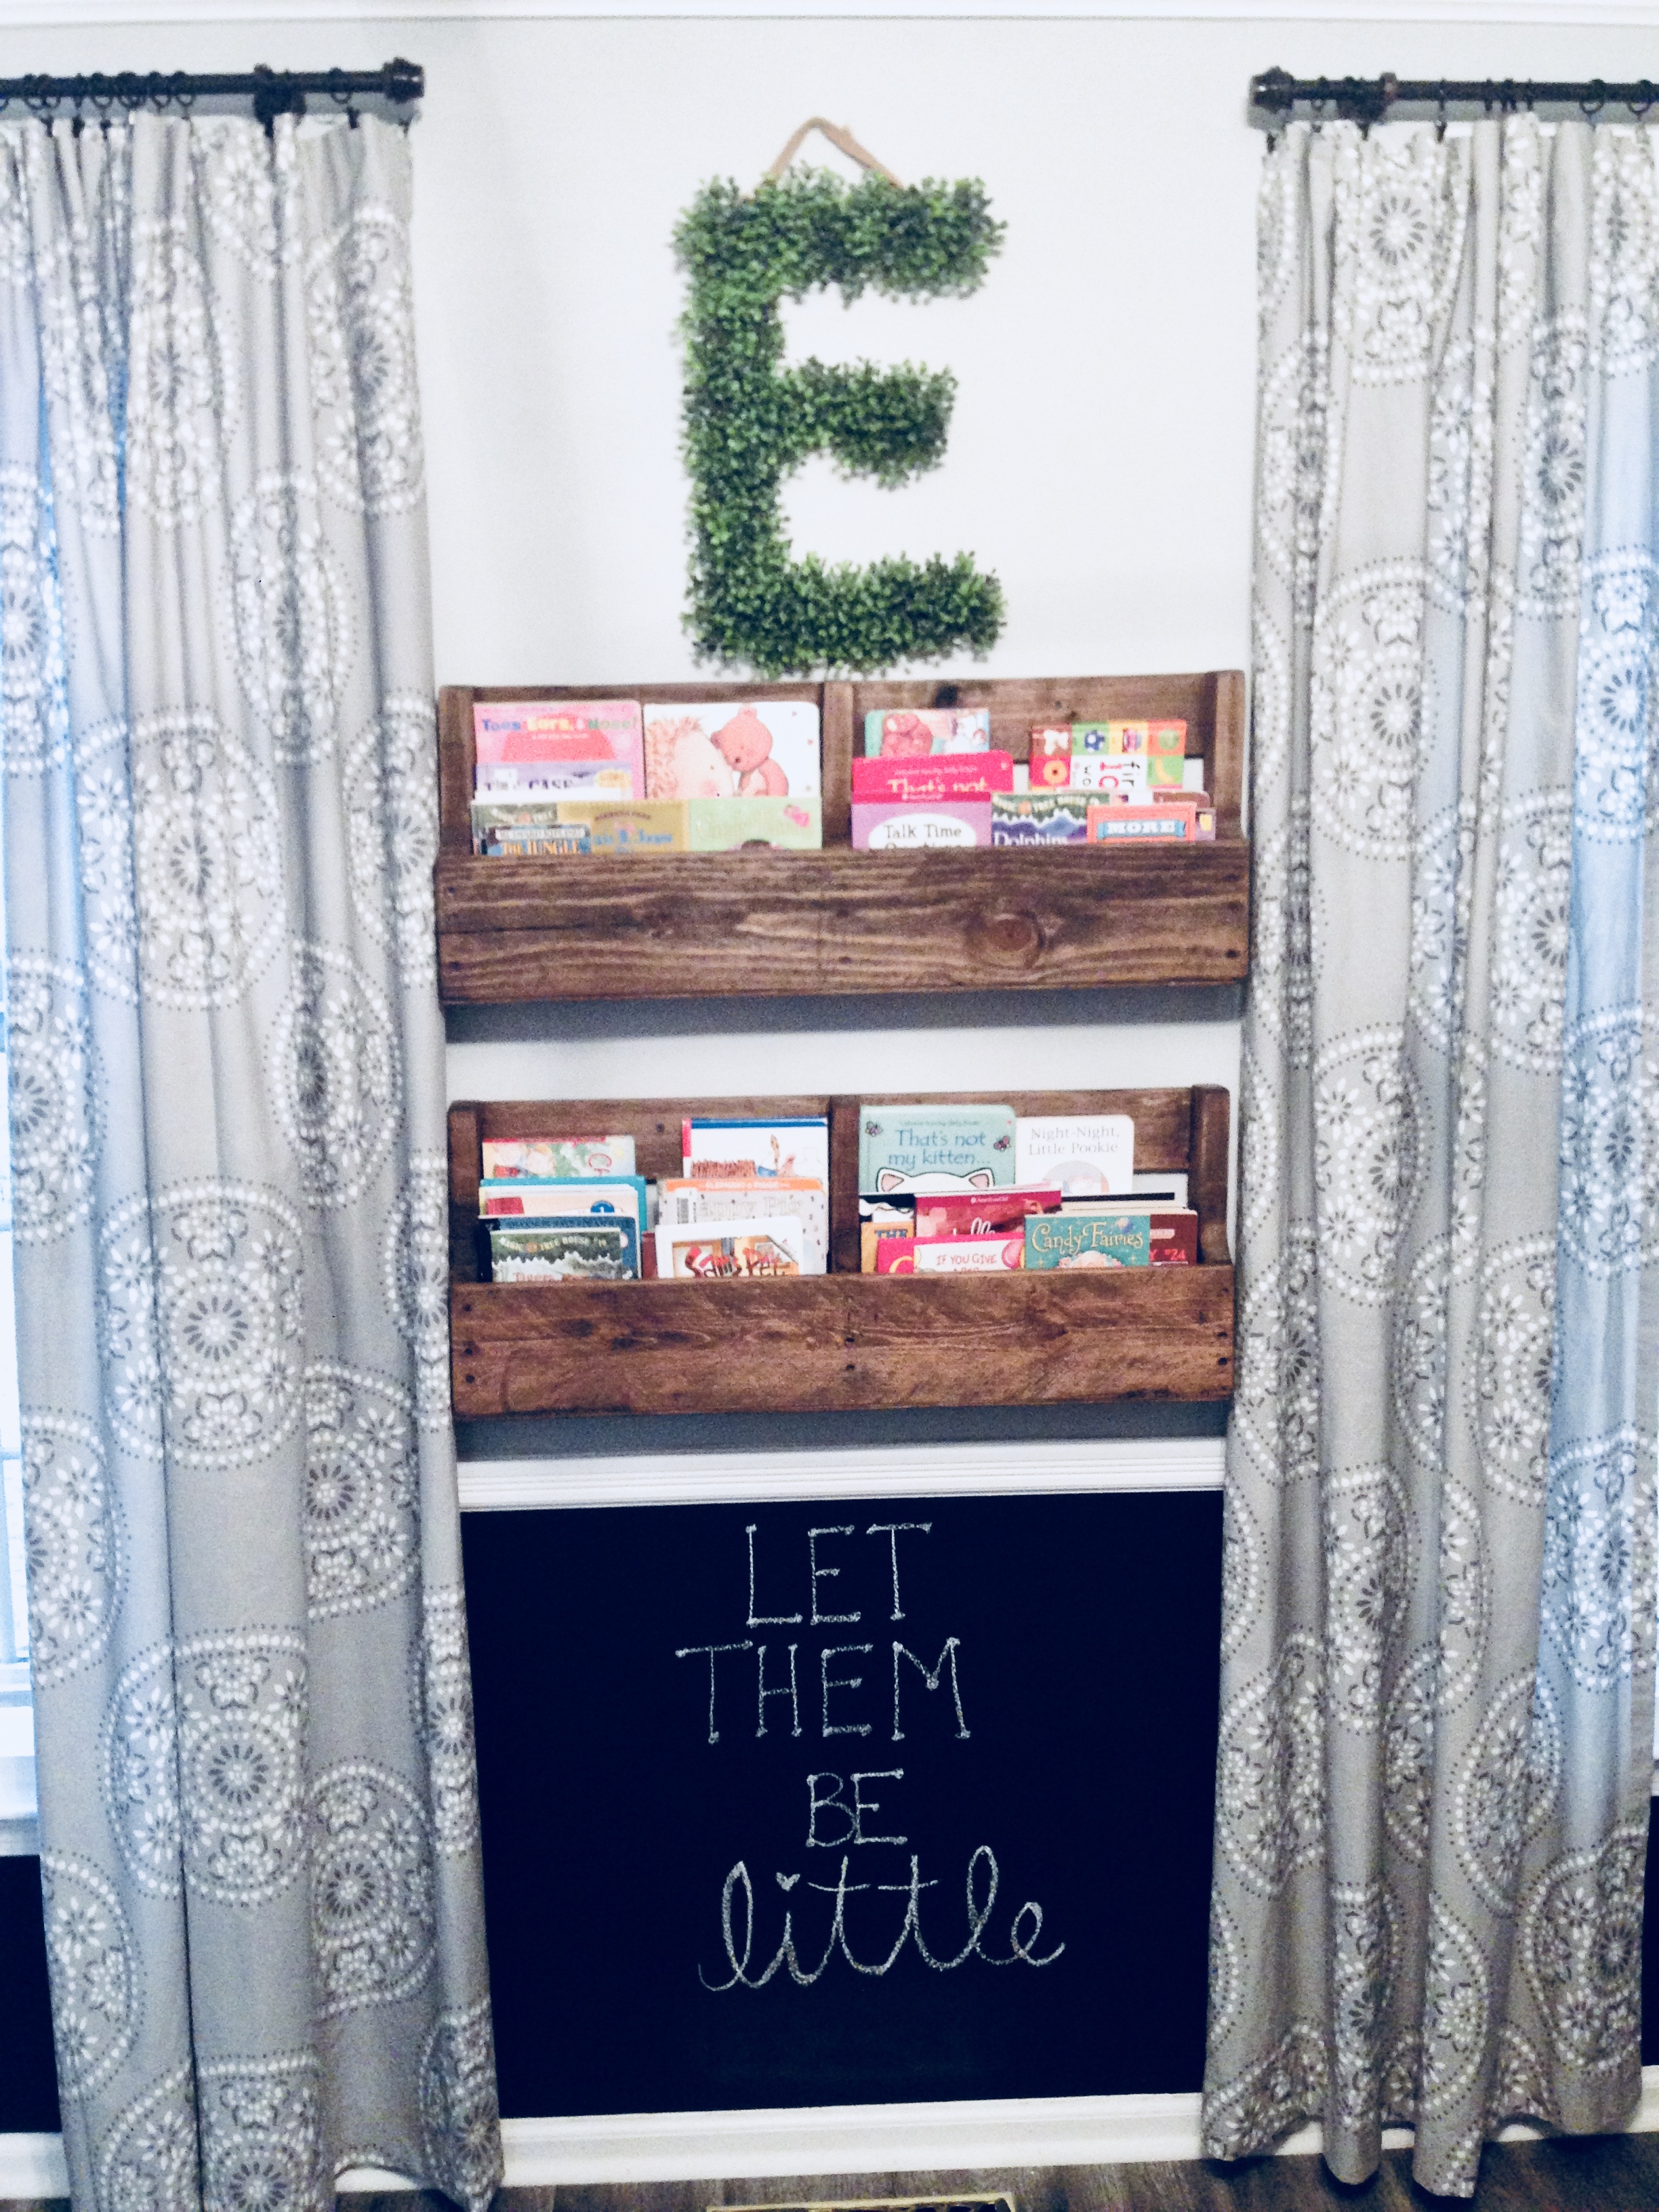
 Once you have your pallet, the next step is to make the cuts using a circular saw.* I flipped the pallet board side up. Then I counted down two boards from the top and made three cuts horizontally and repeated the same process on the bottom of the pallet to make two shelves. Check out the photo for a visual of this step. Next, I sanded down all edges to make them more rounded and to make sure the boards were splinter-free. The bottom was open so I needed to add a bottom to make sure the books don’t fall out. I measured the opening of the bottom and was able to use left over wood from another project. Then I added nail brads and wood glue to secure the wood to the pallet. Once it was all put together it was time to stain. I mixed two stains to make my all-time favorite stain color (Minwax Classic Gray and Special Walnut). The shelves only needed one coat of the stain. I rubbed the excess stain pretty quickly with a cloth after I applied the stain mixture. Note: Keep the shelves outside for a few days..the stain smell is really strong and takes a while to get fully dry. For additional protection, you can add a clear matte or gloss polyurethane finish.
Now for the best part…adding the decorations!!! There are so many different ways to use these shelves…books, magazines, flowers, vases, plants, or flip and use them as shelves for photos and decor items. The possibilities are endless!!!
*Make sure when using power tools to read all instructions and use proper eye protection. Please see our disclaimers for more information.
This post contains affiliate links. For more information, please see our privacy policy. Thank you!
<
About The Author
Jessie
Related Posts

Flooring Transformation with Novocore Flooring
This post is in partnership with Novocore Flooring, a brand & company I love. All opinions…
May 22, 2022
DIY Leather Pulls with Cricut
This post is in partnership with Cricut, a company I love. All opinions here are…
June 18, 2021