
One Room Challenge – Week 5 – DIY PegBoard
Alright, we are just finishing up with week 5 and I seriously cannot believe how incredibly fast these weeks have flown by. That means there is only ONE more week until the BIG reveal. Oh my!!! I am working as fast as humanly possible and that deadline seems awfully tight…Wish me luck guys, I’m gonna need it! May 9th is sneaking on us so quickly!
As always, it is so inspiring to see all the other guest participants designs and of course the featured designers, as well. Be sure to have a look on the One Room Challenge (ORC) Blog site to see all the amazing projects going on.

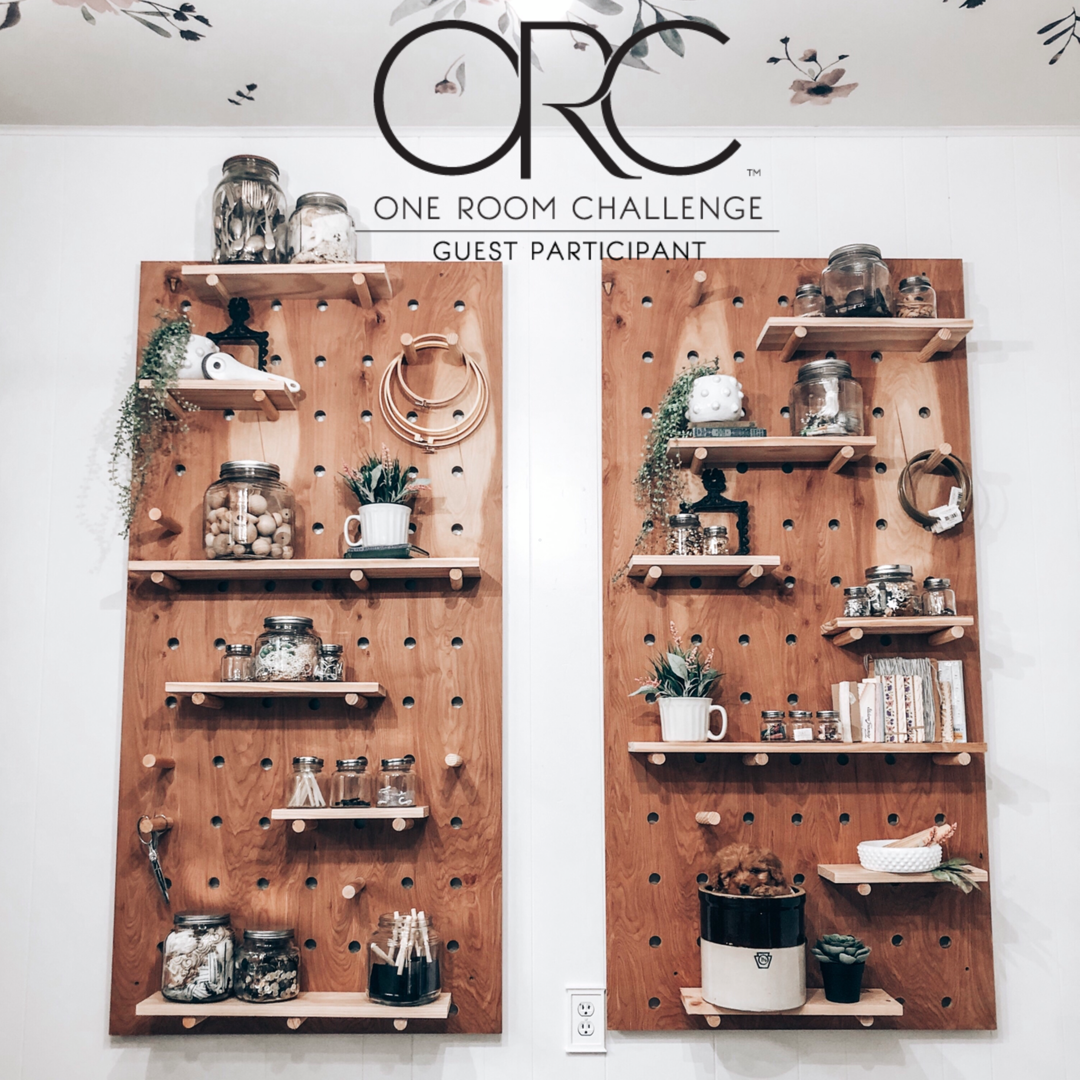
So lets talk week 5! A few big things got accomplished this week. First, the biggest thing that got accomplished this week was my DIY Pegboard. Recently I made a Pegboard for a little girls craft space and have been obsessed with it ever since. I knew I wanted something similar in my own workspace. I love that everything is displayed so perfectly and accessible so I decided to make my own Pegboard for the ORC, but I wanted it to be more Modern and really stand out. A real WOW factor in this workspace.

I really loved how it came out in the end. Do you spot my guest model and assistant, Beau? Lol…So fun and beyond cute, I just couldn’t help myself. He is the exact same color as the stain I used for the Pegboards.

A lot of work went into these big guys this week. If you follow us on IG @ Eyeinthedetail you would have seen all my stories all week, about the progress that went into the Pegboards. I started off with two sheet of Birch Plywood they were originally 8 X 4 so I cut them both down to my desired size. The Birch Plywood was super smooth, so no big sanding right away.  The hardest part about making these was figuring out the spacing of all the holes. Sounds silly, I know! Seriously though, it was so hard. I’m pretty sure my math brain was totally not working that day. After I got the spacing figured out, it was time to start drilling.
 I used a 1″ forstner drill bit and a drill mate Drill Guide to make all the holes. In the end I drilled over 200 holes that day. My arms…the next day!!! They hated me so much. All worth it in the end! It was a big debate whether or not to stain these guys or not so I conditioned them first and then ended up staining them with the Natural Stain color. It ended up being a little too dark for my taste, so I sanded them down slightly.

After they were all dry, I hung them up. Note to self, this really is a two person job. I of course did this while no one was home, so pretty ugly! All body parts were involved, arms, legs and head! I used 1 X 2 lattice boards behind the pegboards to anchor them into the walls and so the pegs could go all the way through without hitting the wall. I used 3 lattice boards per Pegboard and screwed them into studs and then added the Pegboards on top. Drilling them also into the lattice boards. This way everything was very secure and able to handle tons of weight. Once, the boards were secure it was time to make the pegs and shelves. I used 1 X 6 boards for the shelves and 1″ dowels for the pegs.
After everything was cut, it was time for my favorite part…Styling! I started by placing the pegs where I thought they should go and then adding the shelves. I used all the jars that I organized and sorted in week one for the shelves. At this point, I was so happy that I had down all of the organizing earlier, because after all the building I don’t know how much I had left in me. 

I’m super happy with how they came out. I might do a few more things to them if I have any extra time.
Another thing that got accomplished this week was I installed the light fixture…finally! I’ve been patiently waiting for my light fixture to show up in the mail from Pottery Barn, with absolutely no luck. Being as it’s crunch time, no one has anymore time to wait. So I went in a completely different direction with light fixtures. What do you think??
 I went from a beaded Chandelier to a more modern gold light fixture! The best thing about the new light fixture is it has 5 light bulbs, so tons of light which is so amazing in a work/craft space. Since the light fixture was gold, I changed all of my hardware from black to gold. Finding the perfect Gold Spray Paint color was no easy task. I went through 6 different cans to find the perfect shade of gold.
So, that’s all for Week 5…I really still have so much to finish! Also I have a few surprises up my sleeve for the Final Reveal on May 9th so I probably won’t be sharing too much more until then. I can’t wait to get everything all finished and ready for the BIG REVEAL. The timeline is going to be super tight, so I’m back to work.
Thanks as always for following and showing all of your support!
Related Products:
This post contains affiliate links. As always, all opinions are our own. Shopping affiliated links helps support our small brand at no additional cost to you, we appreciate the love. For more information, please see our privacy policy. Thank you!
About The Author
Jessie
Related Posts

Jeffrey Court All-Star Challenge Reveal
Did you blink? That’s how fast the Jeffrey Court All-Star Challenge went by…
July 8, 2020
Week 5 ~ Let’s Get Tiling
Okay…so I’m having flashbacks of my last Jeffrey Court Challenge! Just like last…
July 1, 20209 COMMENTS
Leave A Comment
Angela | 3rd May 19
Oh! Those peg boards! I absolutely love them, and have been wanting to do them for YEARS! Love! Love! Love!!
admin | 10th May 19
I love them too Angela! They have been on mind for awhile as well! You should totally make them…they are amazing!!!
Jeff | 7th May 19
Looking good Jessie.
admin | 10th May 19
Thanks so much!!! xo
Dawn Marie | 9th May 19
You are my hero!!! Love the door, the peg board is awesome and I can’t wait to see the rest!! Your brain is awesome!!!!
admin | 10th May 19
Thanks love for checking it out! Your the best!!!
Greg | 9th May 19
Looks good babe! I have some ideas for the peg board.
admin | 10th May 19
Oh my!!! You do have a designers eye!!
admin | 13th May 19
Thanks so much!!! Too sweet!