
Hello Spring – DIY Porch Sign
It is hard to tell from the weather lately, at least where I am, but Spring is just around the corner. Really, it is, I promise…the flowers and trees will be blooming and we all will be sneezing and swatting away the bugs in no time. That means it is time to get the house ready for the Spring season. The easiest place for me to start is with the porch. This year I was thinking of adding a standing sign for something a little bit different. I always see the signs in the stores and think so cute…I could make that…so why not try it out and see if I really can make it??
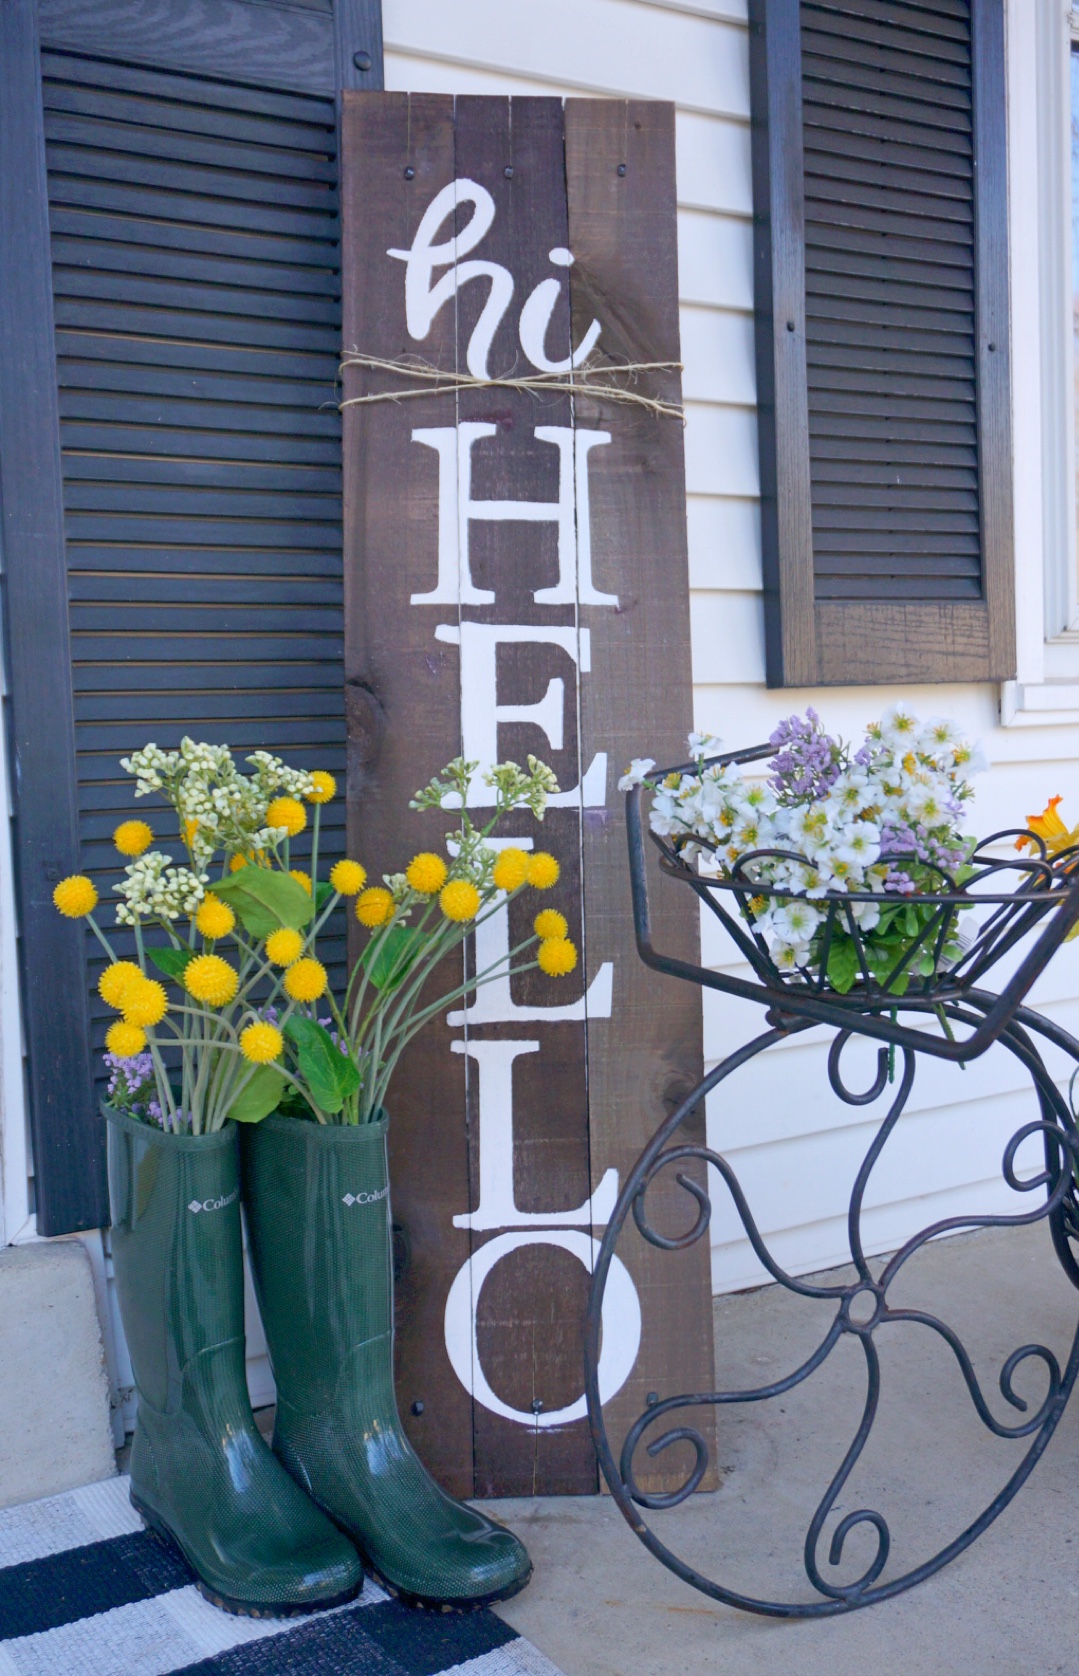
There are a lot of options when making a sign; different sayings, looks, styles and materials. Deciding on what to say was the first step…I chose Hi/Hello because it worked for more than just Spring. Then I chose the type of sign; a wood sign using some old pallet wood I had from another project. I used 3 boards and put them together using a 2×4 on the back and some leftover nails from my DIY Mug Rack project just to add a little more decorative on the ends of the sign. The pallet wood I used I bought from Home Depot was already treated and ready to go, but if you used other wood you might want to stain the surface and prep it before you add the paint on the front.
I debated the many different ways to make this sign before I actually made it and chose to use a stencil and paint. If you are looking for really clean lines vinyl letters would work too. I used my cricut, of course, to make the stencil but you could buy a stencil or actually hand paint the letters yourself, if you have awesome handwriting…which I do not!!
DIY Spring Porch Sign
Supplies
- Pallet Wood (or something similar)
- Cricut Machine (mine is a Cricut Explore Air)
- Stencil Vinyl (I use cricut brand but there are others out there)
- Cricut Mat
- Paint (make sure can be for exterior use)
- Paint Brush or Sponge Brush
- I-Pad or Computer (to run Cricut Design Space)
- Scissors
- Scrapper Tool
- Clear Polyurethane
Step 1: Start off by designing your sign in the Cricut App on the iPad or Computer. You can use cricut downloaded fonts or characters and there are lots of project ideas with instructions included in the app. I usually just buy my images through the app or use the free ones, but you can download images off the internet onto your computer and import them into the app as well. There are also lots of people who sell downloads on etsy or through Pinterest. For this project I used text already in my cricut design space.
Step 2: Once the design is done, press the green button that says Make It. That will take you to another screen where the mats will be laid out.
Step 3: Now to cut the stencil material. I used one large mat 12×24 and one 12×12 mat to get all the lettering and the custom setting on the cricut dial set to stencil vinyl. Once the cuts were made, I cut around the stencil cuts the cricut made with scissors. Then weeded the negative space of the letters. Leaving my design on the clear plastic.
Step 4: Next, put the stencil on the pallet board and layout the design to paint. Make sure to get the edges down as much as possible. I used the scrapper tool to try to press the edges down as much as possible.
One note on this step transfer paper might come in handy when putting the stencil vinyl on the wood. I tried the first letter and the stencil sort of stuck together so the next one I used a trick I read about using Glad Press’N Seal as transfer paper. It helped a little bit but left a sticky residue. This step is a little bit of trial and error to see what works best for you and also depends on how intricate your letters are.

![]()
Step 5: Paint the letters. I sort of dabbed my sponge brush especially around the edges so the paint wouldn’t bleed under the stencil. Because of the wood the edges don’t stick as well as with other surfaces. This just adds to the rustic look!! I did two coats of paint and then removed the stencil. There were a few spots I had to touch up with a paint brush to refine the edges, but I did leave a little but rustic edges, since it will be outside.

Step 6: Lastly, add a coat of clear polyurethane to seal the paint and help from the outside elements if you choose to do so.

All Done!! Now your porch is ready to be decorated for Spring….As always we would love to see your projects and Spring porch looks!!
Happy DIYing!!

Related Products:
This post contains affiliate links. As always, all opinions are our own. Shopping affiliated links helps support our small brand at no additional cost to you, we appreciate the love. For more information, please see our privacy policy. Thank you!
About The Author
Jen
Related Posts

DIY Leather Pulls with Cricut
This post is in partnership with Cricut, a company I love. All opinions here are…
June 18, 2021
Jeffrey Court All-Star Challenge Reveal
Did you blink? That’s how fast the Jeffrey Court All-Star Challenge went by…
July 8, 2020