
DIY Coffee Mug Holder
Hi, my name is Jennifer and I have an addiction to collecting Starbucks mugs!!! I really do realize I have a situation happening with my Starbucks mug collection, but I just can’t help myself. Pretty soon I will need to have a room like in the White House called the “Mug Room.”
It started innocently enough with just a few mugs of the places we had previously lived. We are a military family, so those mugs added up quickly, but then the big move to Europe happened….it all went crazy from there! Before living in Europe, we would go on small  weekend trips and vacations to visit family in California or Ohio. When we moved to Germany, my eyes were opened to all the travel possibilities. It took us a few months to get going, but once we did we tried our best to see all we could in our short three years. With all the travel came all the souvenirs. I have a souvenir addiction…I want everything; magnets, snow globes, scarves, jewelry, and of course Starbucks mugs. Those souvenirs add up really fast, before I knew it I had way over 50 mugs, so many magnets, we won’t even discuss the snow globes, and scarves for every occasion.
Once we made our way back to the states and unpacked all the mugs, I started to think about how I was going to display them. I searched and searched on Pinterest for ideas, but was not finding exactly what I envisioned. I wanted something original so I knew I had to come up with my own plan. Originally, I was going to get a pallet from behind a building but it was just too intimidating for me. Lowes had pallet boards already looking good and finished…I was sold!! The holders took me the longest to find.  I looked at many options; hooks, regular nails, but I wanted them to look more rustic. I went with 2″antique rose head nails I found on etsy. They were a little pricey for nails, but I figured it was going to be a piece of art, right??
As you will notice in the video below, I enlist the help of my husband, Cary for anything involving power tools. I am not quite as brave when it comes to power saws as Jessie and it helps him feel super useful! He does however require lots of supervision and has been known to make some questionable choices in DIYing. A lot of those include multiple holes in our walls while hanging anything up. Which means, I have had to become super good at caulking walls….go teamwork!!
Here are the steps we used to create our mug rack. We are by no means professionals, but this rack looks awesome on our walls and displays the mugs I have collected over the years beautifully…
DIY Coffee Mug Holder
Supplies:
- Pallet Wood (5 pieces)

- Wood for Back (we used 1×4)
- Nails for Mugs (or hooks)
- Nails (1 ½ inch)
- Hooks for Hanging on the Wall
- Measuring Tools (Tape, Yardstick, Triangle Ruler)
- Pencil
- Wood Glue
- Hammer
- Circular Saw *
- Drill with 1/16 inch bit for pilot holes*
- Folding Sawhorse and Clamps
- Lots and Lots of Mugs
Start by deciding what size mug rack you will need. We have made this rack three times now.  The first two we made hold 25 mugs each, but this rack I wanted to hold another row of five for a total of 30 mugs. The Pallet Wood from Lowes is 3.75″x5.5″x47.5″. I placed the mugs on the boards and measured the distance I liked in between each one, it was 6 ½ inches, then I added about 2-3 inches on the top and on the bottom. The total size of the pallet for the 6 row pallet boards was 43″inches. Which meant we had to cut off 4 ½ inches from the bottom from all five boards.
 Next, we cut the wood using a circular saw for the back of the pallets to hold them all together. We used a piece of wood left over from another project. It was a large piece of 1×4. You can really use whatever you want for this step, as long as you feel it is sturdy. Cary cut the wood into 3, 24 inch pieces.
Now to connect the wood to the pallets. This step looked super weird to me at first but after listening to Cary’s reasoning it made sense. The nails we used were a little short, so he felt like the boards would be sturdier with the nail going through the front of the pallet instead of the back. Either way will work…it is a personal preference. He nailed in two nails per pallet in each piece of wood, so that would be 30 nails total. This also took a lot of measuring to make sure the back piece of wood stayed straight. After it was all put together, we added wood glue around the edges of the wood in the back and let if dry for a while.
 This is the time we added the picture hanging hooks on the back for hanging the piece on the wall. We learned the hard way when we didn’t do this step at this point last time we built the racks. There are multiple options for hooks to hang on the wall. Use whatever you like and find the easiest, but make sure they are capable of holding heavy objects. Once this rack is finished and all the mugs are on it, it is very heavy. For this reason we put the hooks 15-16 inches apart (the distance of studs). It is pretty important to hang this into a stud when you are all done!! We have also learned this lesson the hard way…aka the great snow globe incident.
 Now that the wood is all put together, the next step is to measure and measure some more. This is where a large ruler really helps. Cary marked where all the nail holders were to be placed. As I said above, we placed them 6 ½ inches apart, with the first one about 3 inches down. We lined up the mugs before hand to make sure they looked right and adjusted a bit down from the top so it matched the bottom.
 Drill pilot holes for the nail hooks. This helps to ensure the wood doesn’t split right down the middle when you hammer the nails in. Cary used a 1/16 inch drill bit for this step.
Now on to the nails….hammer all of those guys into the pilot holes. Make sure to do this at a slight angle downwards so the mugs will stay put when on the wall. Check all the nails to make sure there is no wiggle room. Turn over the pallet and put wood glue in the backs of the nails. Ours show through the back and on some of them the wood is cracked a little. This is fine as long as you wood glue and double check it is sturdy. Let the glue dry and do another double
  check of all the nails to be sure they are sturdy and in the wood to your liking.
Now for the fun part…well almost. First you have to get this sucker on the wall. Make sure to find the studs!!!
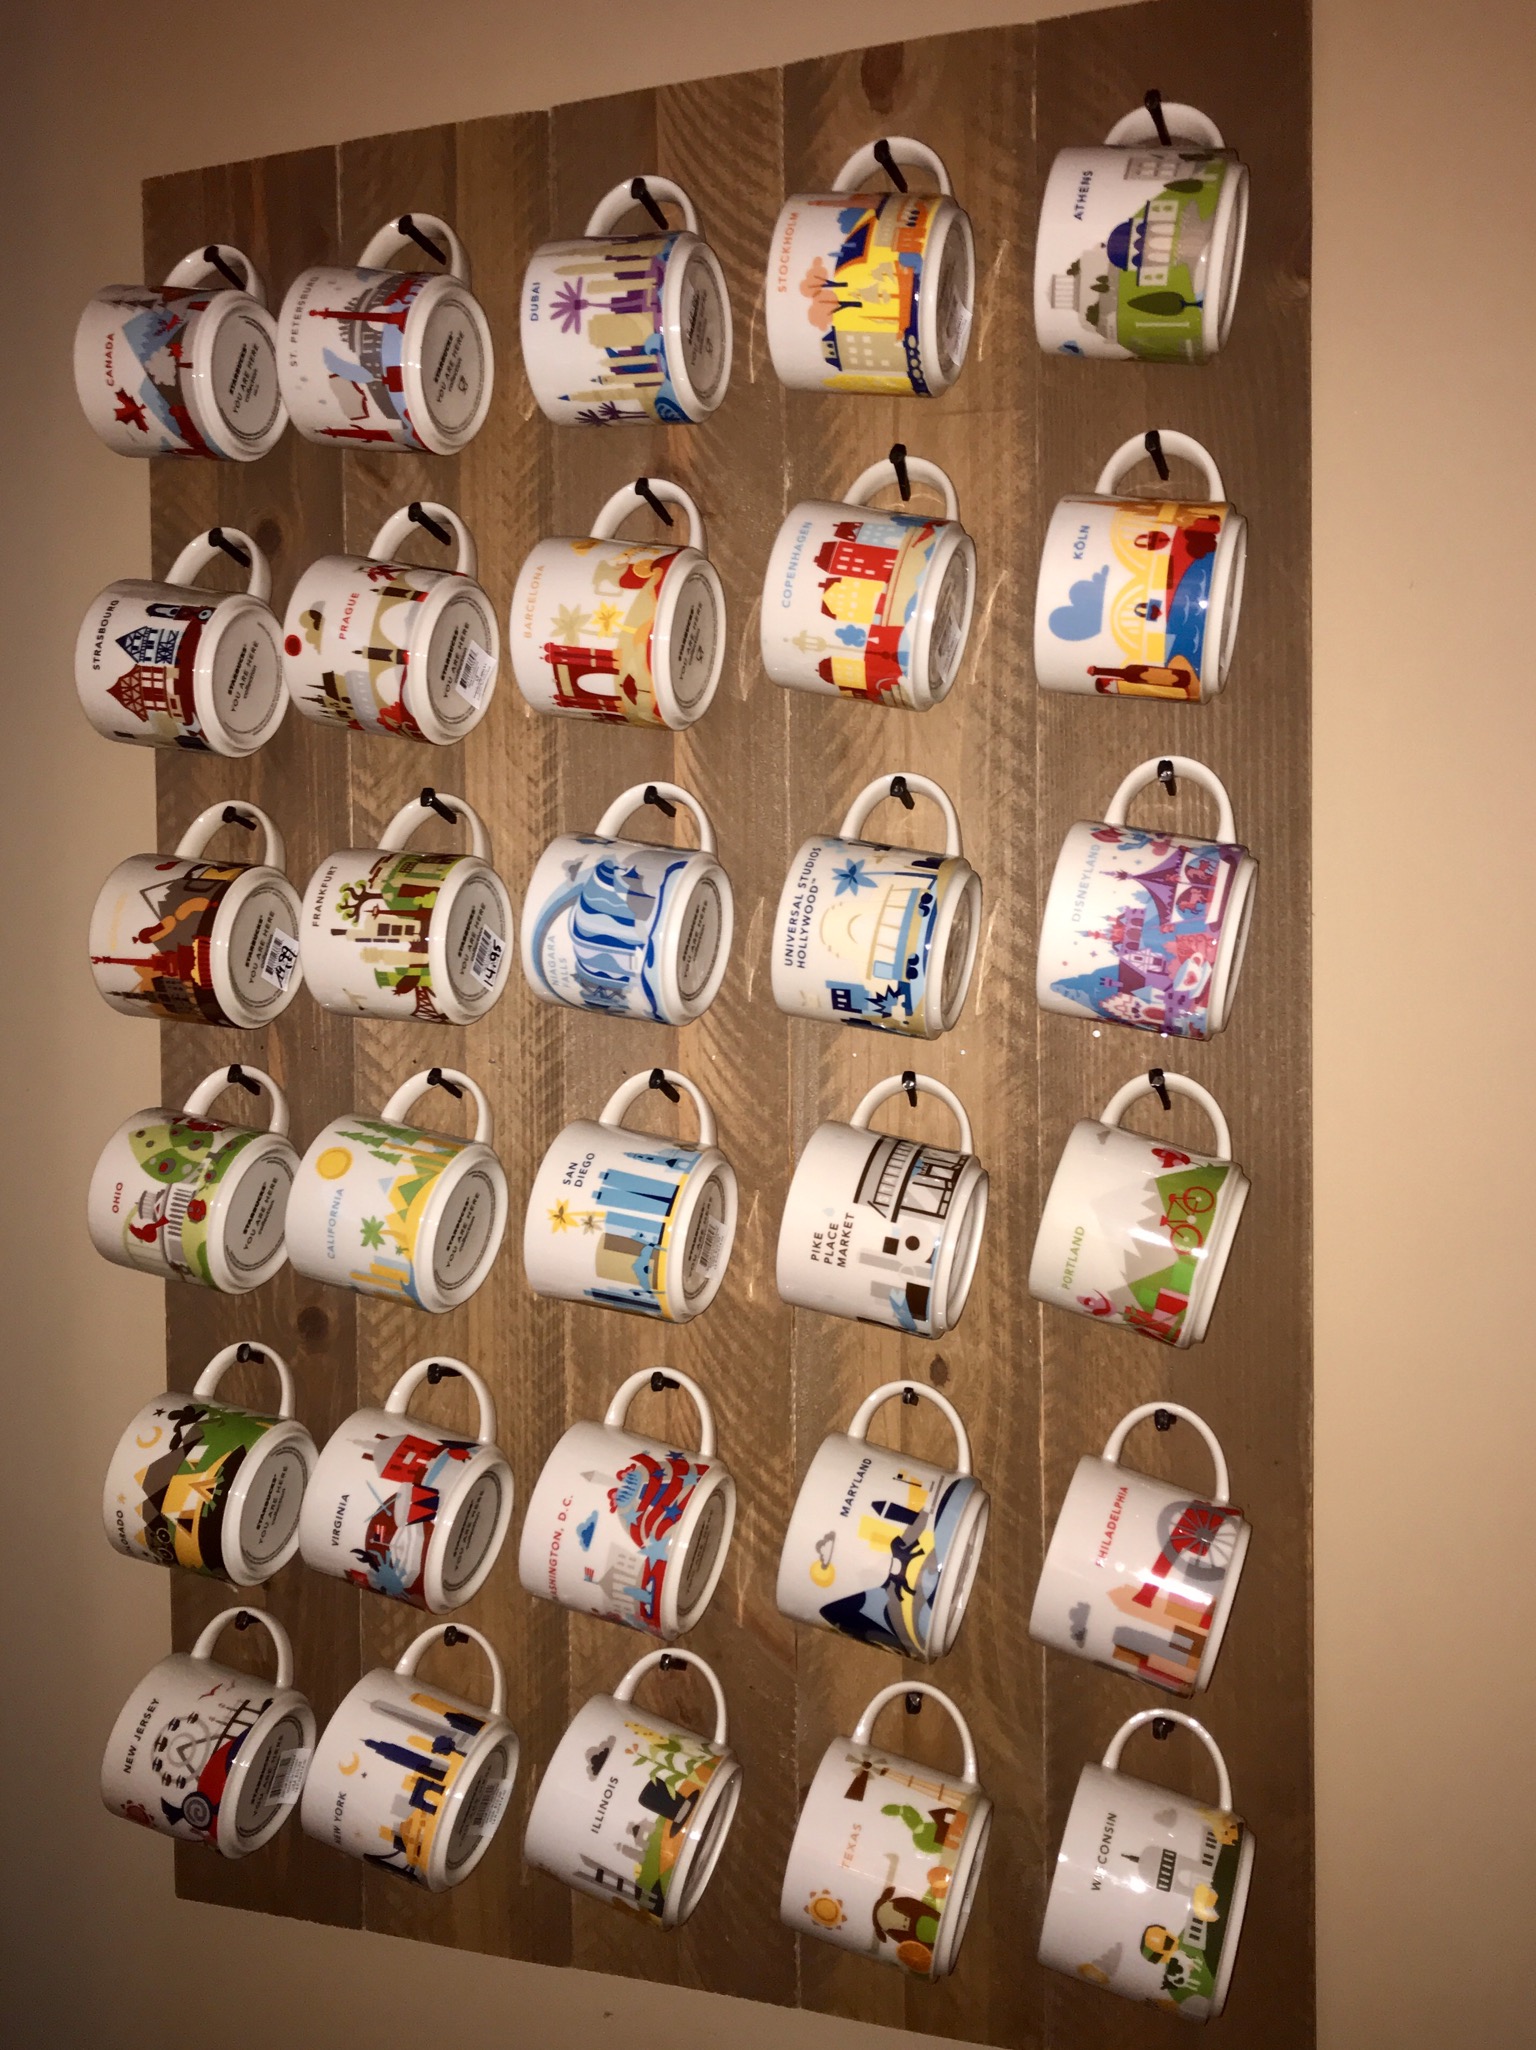
Once it is up on the wall add all the mugs. So awesome…I love looking at all my mugs and remembering the amazing trips we took over the years!!
Do you have a souvenir addiction like me?? If so, let us know, comment below…we would love to hear from you!!!
Here are the first two racks we made…

* just a note…please read all instruction manuals prior to using tools and wear proper safety equipment.
This post contains affiliate links. For more information, please see our privacy policy. Thank you!
About The Author
Jen
Related Posts

Flooring Transformation with Novocore Flooring
This post is in partnership with Novocore Flooring, a brand & company I love. All opinions…
May 22, 2022
DIY Leather Pulls with Cricut
This post is in partnership with Cricut, a company I love. All opinions here are…
June 18, 20211 COMMENT
Leave A Comment
Jeff | 2nd Nov 18
Virgin coffee cups, my favorite!