
DIY Teacher Gifts
It’s that time of year to thank all the amazing people who help support our children and help them grow. Teachers do so much for our children all year it is really nice to thank them, especially at the holidays for all their hard work and patience. It is so difficult to come up with new and creative ideas each year for the teachers. The standard go-to gifts are always appreciated by the teachers, but sometimes it is fun to get creative.
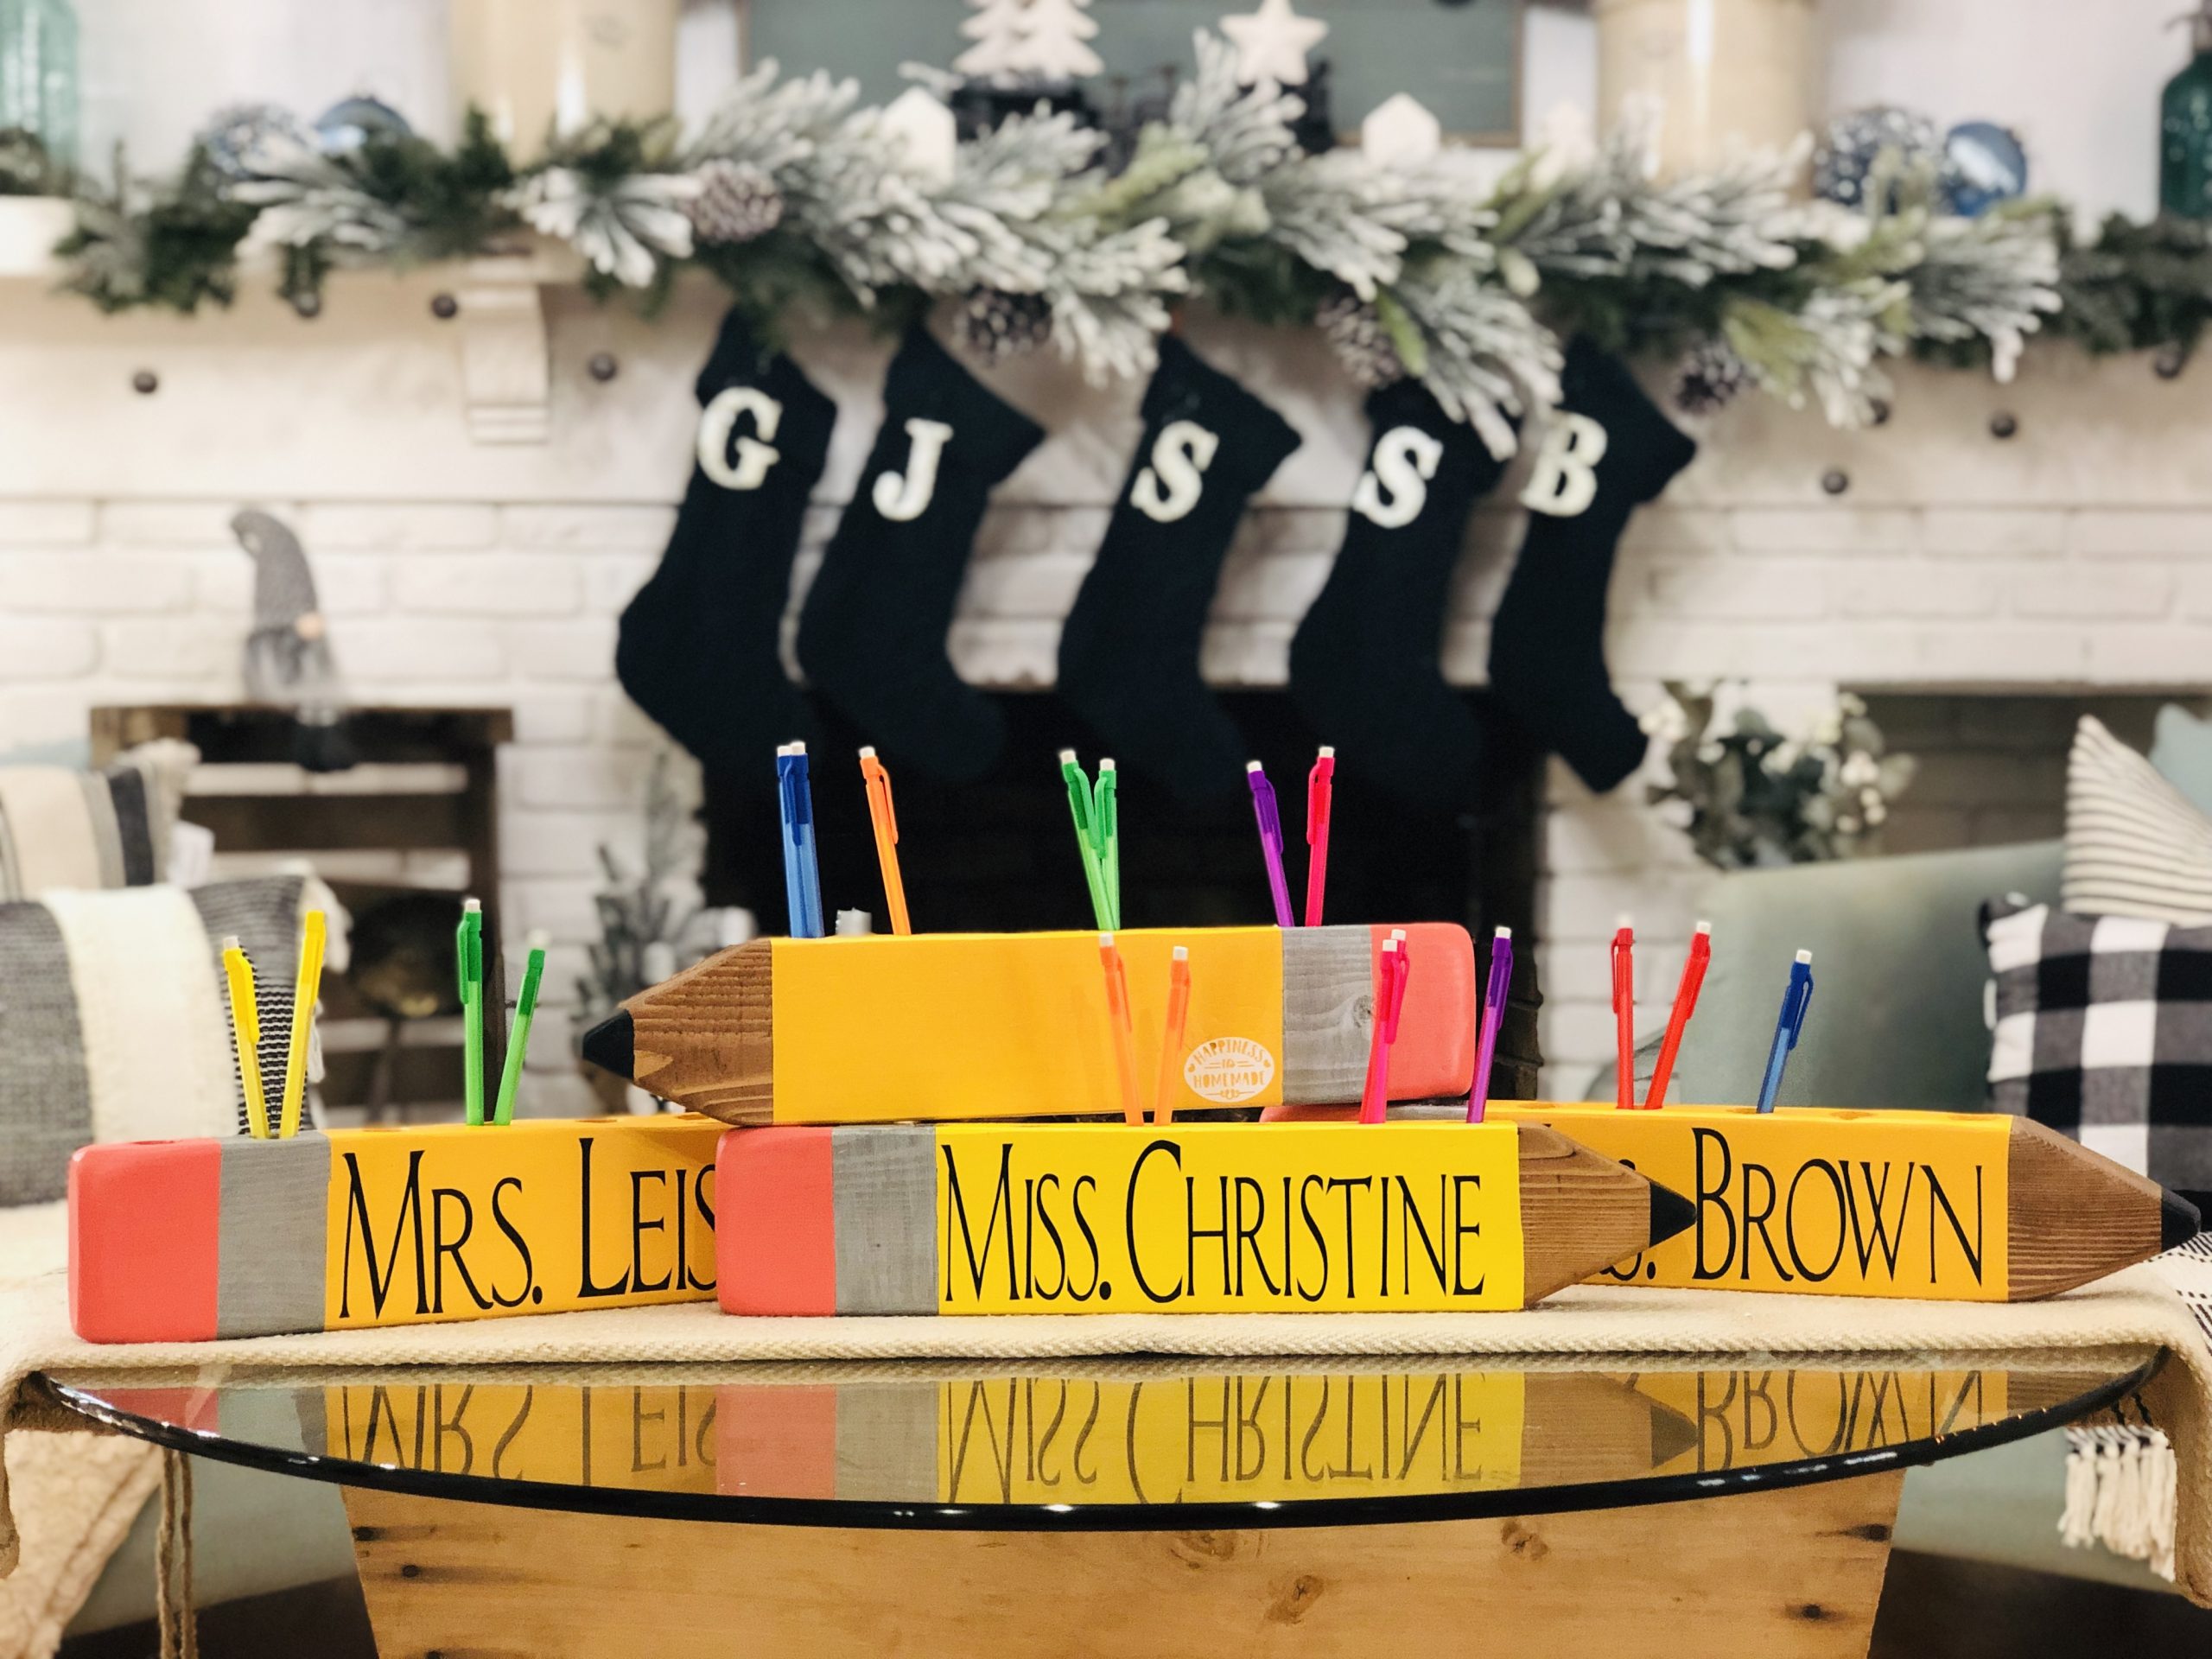
This year, I am working on a DIY Personalized Wooden Pencil Holder. I actually bought one of these off of Etsy a few years back for one of my amazing teachers and thought to myself ~Hey, I could totally make this myself…if I had the time of course. Well, this is the year! This would also be a great gift for Teacher Appreciation Week or End of the Year Gift.
So…Let’s Get Creating! 😉
Personalized DIY Teacher Pencil Holder

Supplies:
- 2 X 4 Wood
- Miter or Circular Saw
- Drill with a 1″ or 7/8″ Paddle Bit
- Sander
- Light Wood Stain (I used what I had leftover in my house- Honey)
- Yellow Paint (I used Martha Stewart Craft in Satin Acrylic -YellowJacket)
- Black Paint (Martha Stewart Craft in Satin Acrylic – Black)
- Silver Paint (Martha Stewart Craft in Satin Acrylic -Silver)
- Light Pink (Americana Satin Acrylic – Shrimp)
- Painters Tape
- Sharpie (OPTIONAL)
- Clear Polyurethane
*Make sure when using power tools to read all instructions and use proper eye protection. Please see our disclaimers for more information.
Step 1: Cut your 2 X 4, 17″ long. My 2 X 4 was 6′ long this gave me 4 boards to use. 

Step 2: Measure off the front of your pencil shape. Measure down 3″ and mark off a straight line. Next, mark off for the tip of the pencil. I marked the middle of the board and then mark off a 1/4″ on both sides making the tip a 1/2″ total. Using my Speed Square I marked my angles, starting at the pencil tip to the 3″ mark. Next cut your angles with your miter or circular saw. I ended up using my circular saw for this and clamped down my board to keep them steady. 


Step 3: Mark your pencil holes. I did 7 pencil holes. I measured 1″ from the eraser end and then 2″ from each hole. Make sure they are all centred. Then drill your holes. I started with a 1″ paddle bit and after messing up 2 boards, by drilling through the sides I went down to a 7/8″ paddle bit. Obviously, I need to work on my steady hand! 😉


Step 4: Get sanding. Sand thoroughly, the eraser end needs the most love. Make sure it’s rounded.

Step 5: Stain your board. This is for the tip of the pencil to give it a natural pencil look. You can do the whole board or just the pencil tip. Let it dry for the allowed time suggested on the stain directions.

Step 6: Time to paint! Tape of the pencil tip, the middle section and the eraser section first. I painted the Black tip first, worked my way down to the Yellow middle and finished with the Pink for the eraser. Also, let dry. I need to do 2 coats of black and pink. The yellow middle ended up needing a third coat.


Step 7: Remove the painters tape and carefully paint the Silver section between the Yellow and Pink section.

Step 8: Personalising my Gift! This is optional, but I think it add the perfect Detail. I wrote out the name in Pencil first and then carefully wrote over it with a Sharpie. You can use paint as well. If you have a Cricut this is the perfect project to break that tool out!!!

Step 9: I finished and sealed this with a clear Polyurethane and allowed it to dry again.


That’s it!!! I know, it’s actually alot…lol, but they were super easy to make and beyond cute. Who doesn’t love a gift that was made with lots of love?
For those of you not comfortable breaking out your power tools …Here are some other great ideas:
- DIY Personalized Canvas Bags

- Drink Tumblers

- Personalised Gift Basket

- Gift Cards of Course! 😉

Happy Holidays!! 🙂
 Jessie
About The Author
Jessie
Related Posts

Flooring Transformation with Novocore Flooring
This post is in partnership with Novocore Flooring, a brand & company I love. All opinions…
May 22, 2022
DIY Leather Pulls with Cricut
This post is in partnership with Cricut, a company I love. All opinions here are…
June 18, 2021