
Fireplace Update!
Just thought I would pop in this week and share my final look of my fireplace makeover! Do you remember last week when I shared my half finished Shiplap photo? I thought I could bang-out a super quick project in-between getting all the kids off to school. The girls leave around 8:30 and my little guy leaves around 11, so that gives me 2.5 hours. Obviously I must have fallen out of bed that morning and hit my head because I’m not sure what I was thinking.
Does this ever happen to anyone else? Or am I completely alone? I often get an idea in my head of something I should do, even though there are 500 other more important things I should be doing and I just can’t help myself.

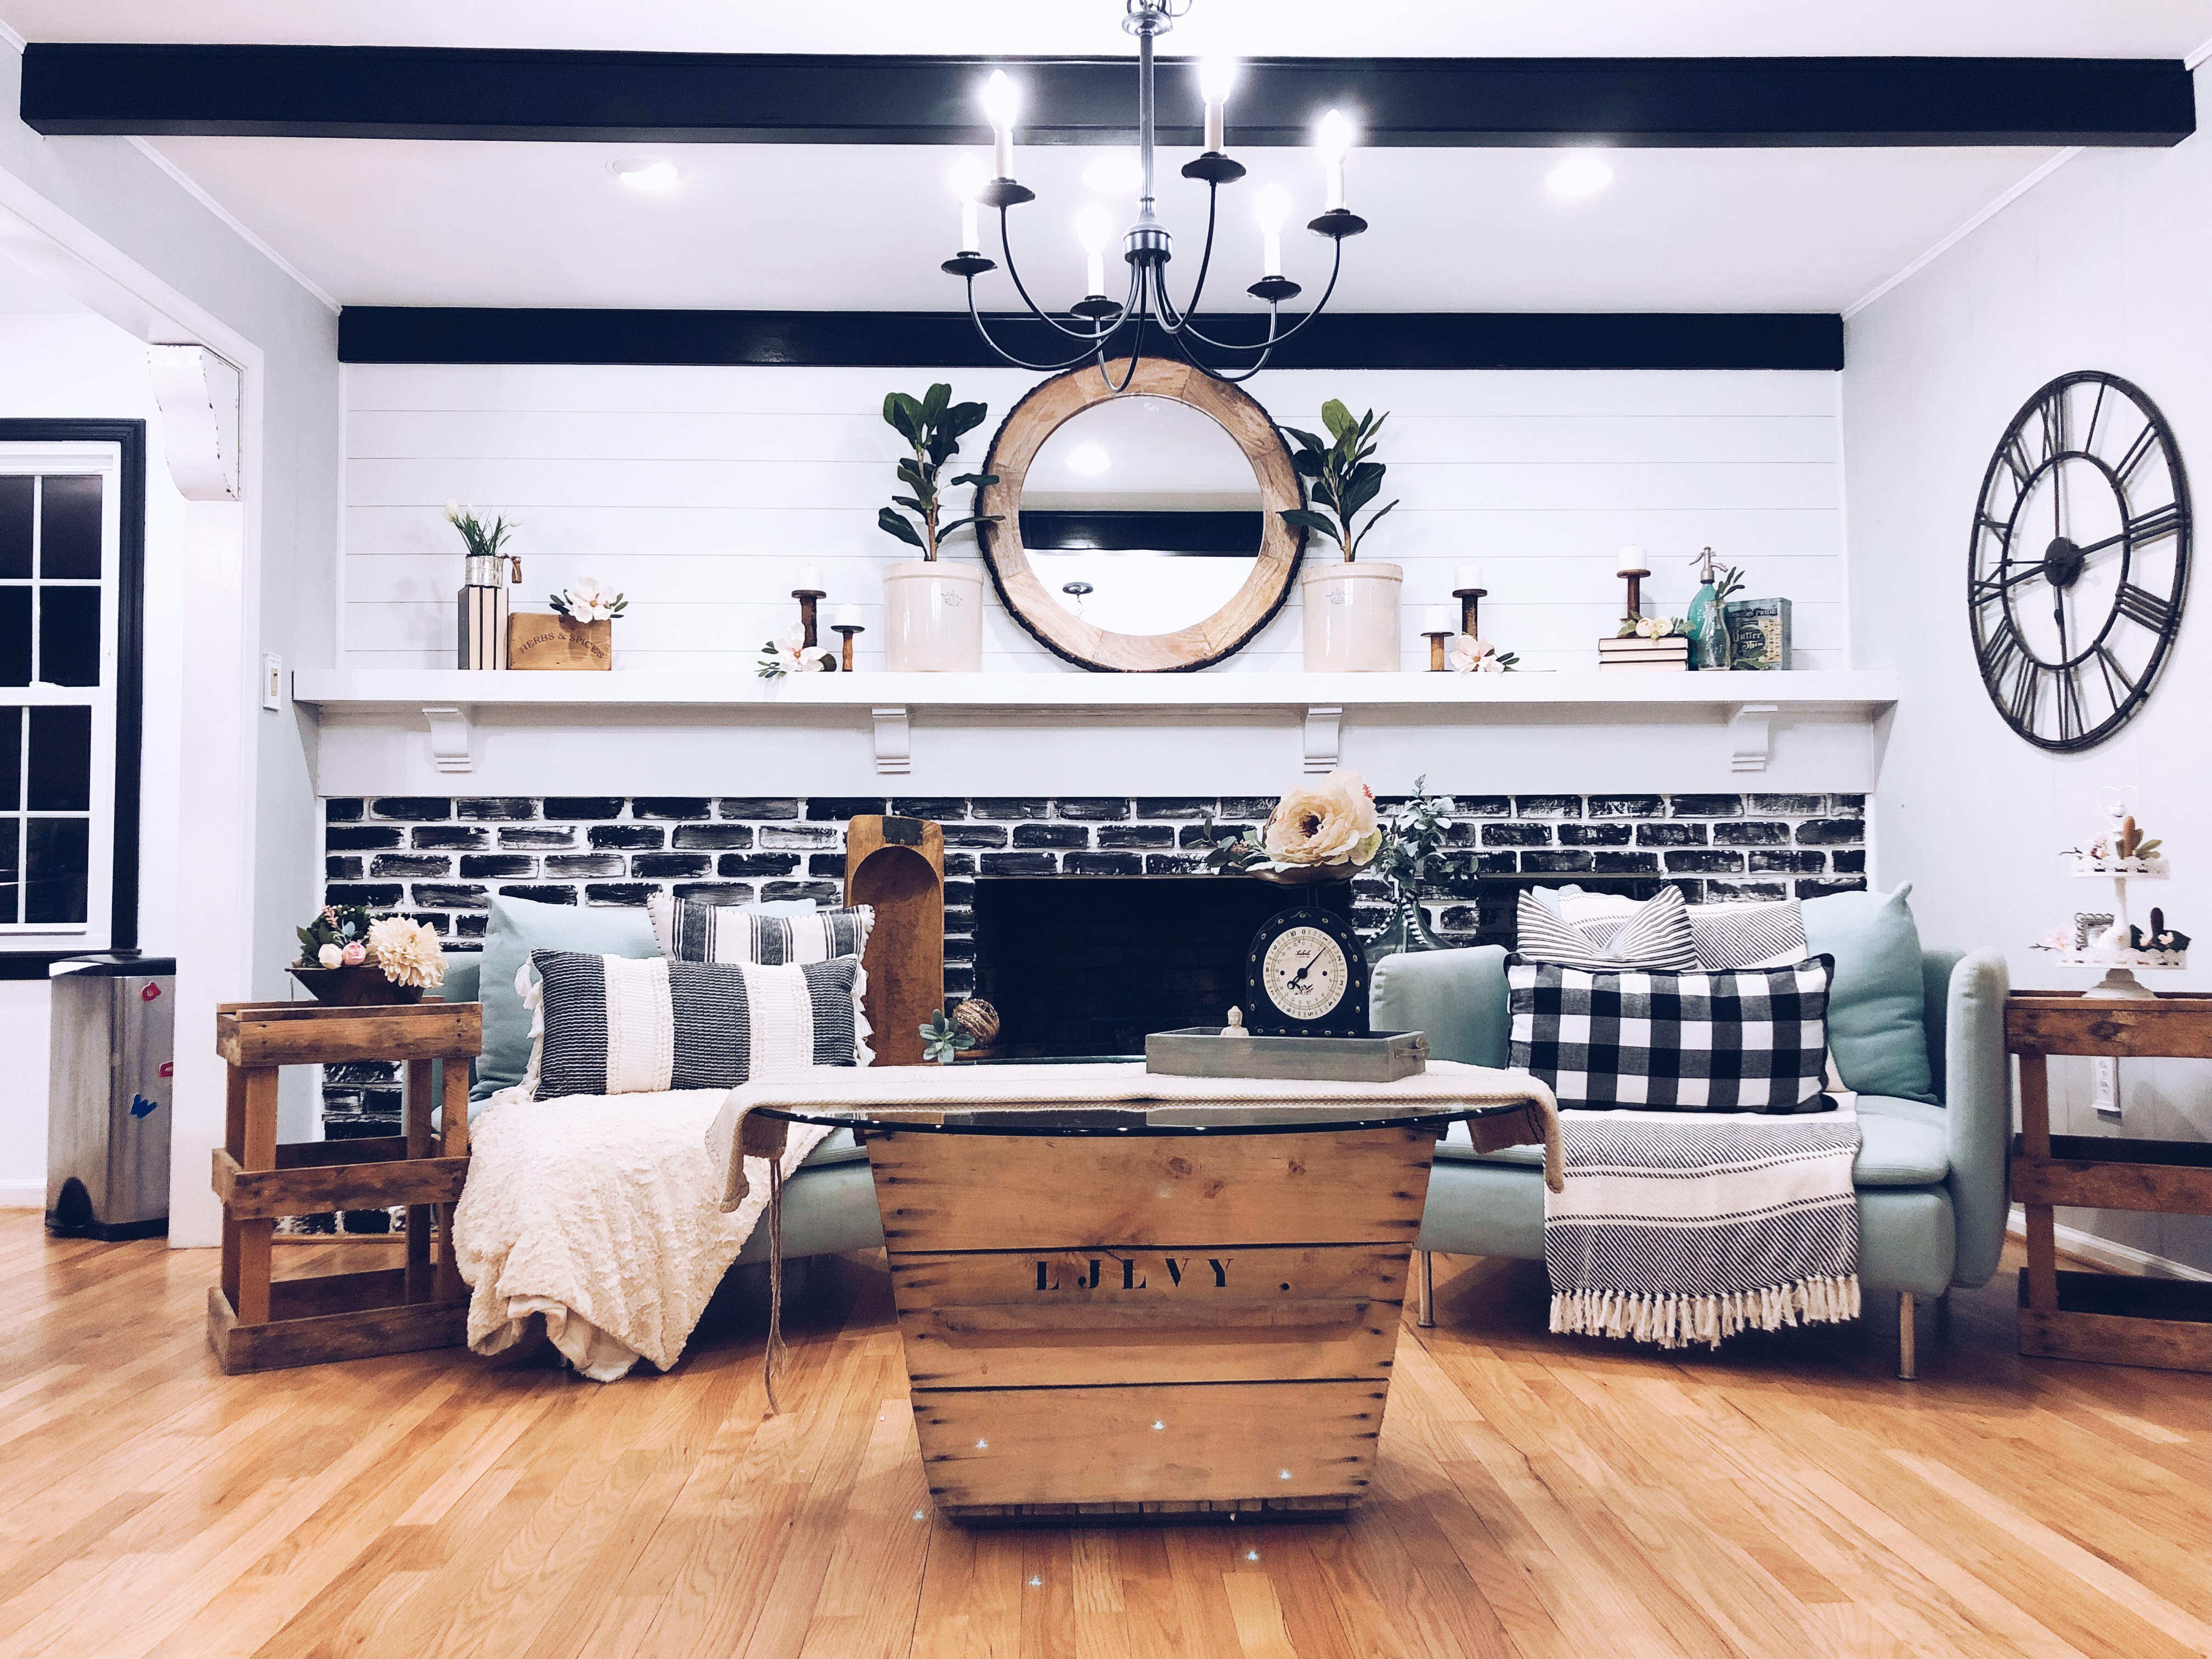
Anyways, back to my fireplace. My fireplace has been bothering me since we moved in. I have painted the top piece at least 7 times, navy, blue, teal, gray, whitewash, dark gray…I mean seriously…Pick a color! Nothing ever seem to really work. So last week, I had the great idea maybe I should give up on the paint color and just stick to what I’m good at…Shiplap…lol! I thought I had enough leftover boards to finish the top of the fireplace, so I might as well bang it out real quick…What a joke!! I got halfway done and ran all out of my boards…ugh! Back to Lowe’s I go!
If you haven’t read our full DIY Shiplap Tutorial you can find it here. I got all my boards cut 5″ wide by the nice guys at Lowe’s once again. Went home and finished the top of the fireplace with Shiplap. The only thing I did a little different this time was I wanted the boards to be one long strip, no gaps separating them. I wanted to have a more cleaner Modern look with this Shiplap. So I filled the gap space in-between the boards where they lined up with wood filler. I let the wood filler dry and then sanded it down. A few boards still had slight noticeable lines so I repeated this step twice.
 When I was finished I primed all the boards and then gave them two coats of Benjamin Moore Paint in Chantilly Lace in Pearl Finish. Boom… Shiplap Done! Why Stop there!!! 😉
Like most projects, this turned into the Snow Ball Effect. One small thing turned into another, into another, into a huge project..Yikes…Don’t tell Greg!! I’m pretty sure he still hasn’t noticed anything different in our house and I’m not even joking…LOL! The other week I painted all my ceiling beams black with Gel Stain, which is really what started all these changes. You can see our DIY Gel Stain Tutorial here if you missed it. I wanted something on the fireplace to tie in with the black ceiling beams. So I decided to paint the bricks on the fireplace black.
 Originally I was going to do them a solid black color but once I got started it went in a different direction. I made them look more like a German Smeer but instead of red brick they are black.
 I used Sherwin Williams paint in Black Magic for the bricks and carried that paint color into our Kitchen as well, painting the frame in Black Magic to keep tying all the rooms together. Can you tell I have an obsession with Black these days??? Let’s hope it sticks!!

Ready to see the final look?


So much fun updating this space! Be sure to keep following, next week I will completely finish this room by hanging up my DIY Modern Barndoor.

Happy DIYing!

Related Products:
This post contains affiliate links. As always, all opinions are our own. Shopping affiliated links helps support our small brand at no additional cost to you, we appreciate the love. For more information, please see our privacy policy. Thank you!
About The Author
Jessie
Related Posts

Flooring Transformation with Novocore Flooring
This post is in partnership with Novocore Flooring, a brand & company I love. All opinions…
May 22, 2022
DIY Leather Pulls with Cricut
This post is in partnership with Cricut, a company I love. All opinions here are…
June 18, 2021