
DIY Shiplap Wall – Quick, Easy & Cheap
As first time homeowners, I was so excited to get into this house and really make it my own. It had lots of potential but, required some much needed love!!! In our previous houses, which were normally base housing for the Army, the only thing I could do to make it my own was to paint. Sometimes, I would paint every single wall in the house and others I would pick accent walls to do. All those white walls, would make me crazy. Funny because now in my own home I keep painting everything Bright White!

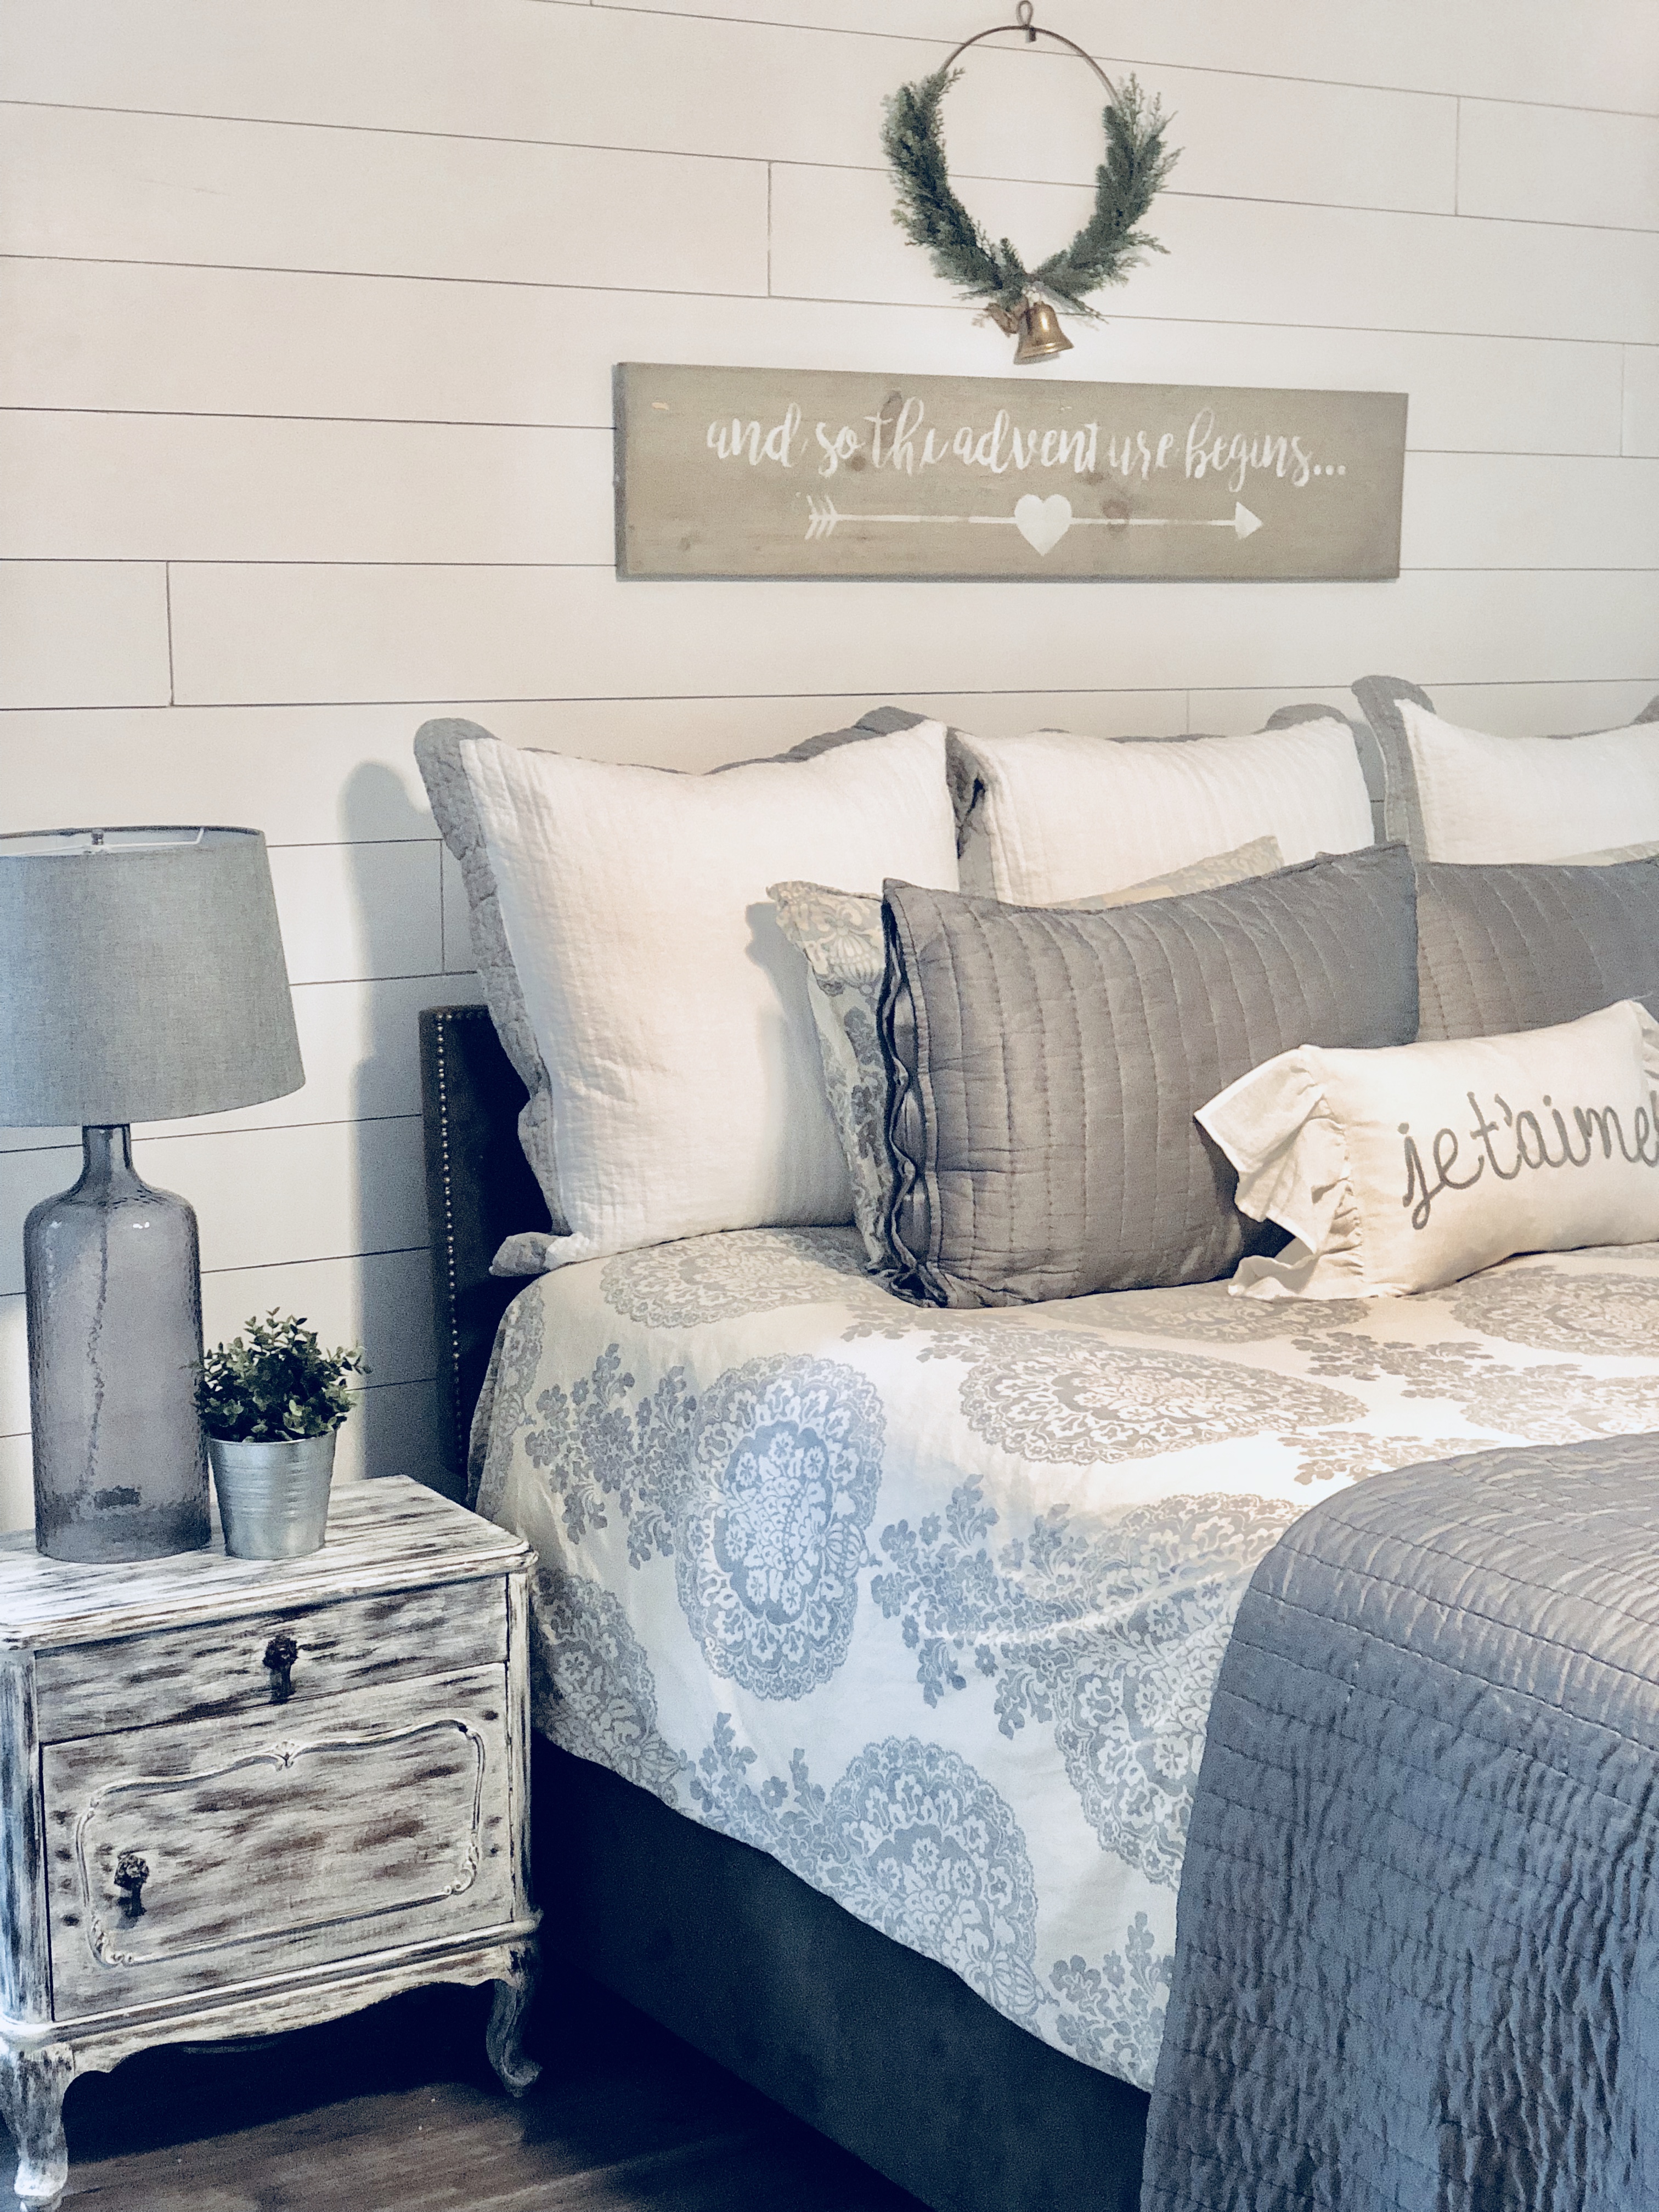
My favorite project I’ve been doing in the house is accent DIY Shiplap Walls. Everyone always asks me how to do it and will I come to their house and do it for them. Well, it’s actually super easy and I love doing it so much I should start a business of Shiplapping Walls? 😉 It all started with our Master bedroom, I wanted to add some depth to the room. When I started looking at Shiplap it was super expensive…almost $20 per plank! Whaaaatttt???? I only needed 100 to finish the wall. I started hearing and reading about how you could make your own Shiplap with Floor Underlay. One sheet of underlay was under $20. I was all in!!
Investing In Tools….
When I first started, I had no tools to my name! Tools are definitely an investment and you need so many for each project. Luckily, I have the most amazing neighbors who lend me ALL their tools, whenever I like. Super cool, I owe them big time!!
I started the shiplap in the Master bedroom using my borrowed Nail Gun and Air Compressor. If you have ever picked up an air compressor…yikes…I am a girl and honestly believe I can do anything I put my mind to, but I am not a weightlifter! When I was all finished with my Shiplap wall in my bedroom I had to get that bad boy down the stairs and into my entryway….lets just say I’m lucky to be alive! The thought of getting that thing into the car to my neighbors house sounded impossible, so I left it in my entryway for sometime waiting for my husband to take it for me. The longer it sat there, the longer I thought what else could I do with it. On to the next room to be Shiplapped…Entryway. After I was all finished, I decided to get that compressor and nail gun out of my house as quickly as possible before I shiplapped the whole house.
Well, of course that didn’t stop me. For my birthday, I got my very own battery operated Nail Gun. If you would have ever told me that I would have asked for a Nail Gun for my birthday I would have thought you had gone mad!!! PS…Nails gun with a battery are so much lighter and easier to use. I needed a project for my new toy and was in the process of remodeling my powder room, which had been covered in the most amazing rustic themed wallpaper you have ever seen. Once it was all gone, the walls were pretty banged up and covering them was the perfect option. Bring on more shiplap…3 walls of it in the bathroom.
I am currently working on Shiplapping my Kitchen Island. Thats got to be it…right?? Somehow I have become Shiplap Obsessed. Just a disclaimer, once you know how to do this easy DIY Shiplap there is no going back…you might need someone to hide your Nail Gun for you!!
How many rooms is that??? Four rooms…4 times I have Shiplapped a wall. I’m going to say I am officially a self-proclaimed Shiplap Expert! LOL…who doesn’t want that title?
Here’s my go to Tips and Tutorial for Cheap and Easy Shiplap.
DIY Shiplap Wall
Supplies:
- Nail Gun with Battery or Compressor*
- Heavy Duty Adhesive Glue
- Floor Underlay -Plywood 4′ X 8′
- Nickels
- Level
- Circular Saw*
- Speed Square
Cutting the Shiplap
Start off with a sheet of flooring underlay, I just discovered the most amazing kind from Lowe’s. Its called RevolutionPly and it is only about $17 per sheet. It’s pre-sanded and blemish free. If you haven’t done this before you have no idea how amazing this is. Normally, I would have to sand down each strip of Shiplap to make it look smooth and nice. I always get my sheet cut by the nice workers at Lowe’s or HomeDepot. They are so helpful when you ask to get something cut.
 I’ve become quite a regular there, I’m surprised they don’t run when the see me. They normally do a few cuts for free, last time I think I had 30 cuts and they still didn’t charge me…just be kind 😉 Before you get your plywood you will need to decide on your Shiplap width. I’ve done 6″ & 5″ pieces. I prefer the 5″, that’s what I used in my bathroom and my kitchen island. At 5″ wide that gives me 9 strips of Shiplap 8′ feet long and a little leftover. If you do the math, that is less then $2 for each plank of Shiplap. Score!!!
Sanding
After your shiplap is cut into strips, you sand down the top and bottom of each piece.  If you use the new underlay I told you about above this step is so minimal…so awesome!! Why did I just find out about this new product? The guy at Lowe’s told me they just got it in this Summer. I think someone caught onto what everyone was doing with underlay lately.
Up on the Wall
Alright, lets get this shiplap on the wall. I start at the very top of the left wall on the and work my way to the right and down. The first piece is a big guy 8′. I have done this ALL by myself before but, trust me if you can get an extra set of hands for the first piece or two your life will be much easier. I look pretty ridiculous, I try holding things with my head, legs anything that can reach..Not CUTE!!! Add your glue to the back of the first piece, put it on the top left corner and use your level to make sure the whole piece is leveled before you nail that bad boy in. This is where that extra hand comes in handy.
First piece is up and level..Next measure the distance between the first piece and the wall. If its under 8′, time to get your saw out. I just use a circular saw and Speed Square. After you have the piece measured and cut, make sure you try it in the position first before you add the glue. Trust me…recutting wood with all the glue on the back absolute mess. Ugh!!!
Adding Spacers
You should have two pieces up now…or 3 or more…just depending on the length of your wall. Take your leftover piece from the second board or last used board and use that to start off your second row. This is where you are going to add your gap with spacers…aka your nickels.  If you are painting your boards a different color then the wall color make sure you start painting the gap before you put up the next row. In my bedroom, the walls were blue, you don’t want to see blue through the all the gaps. Even though the gaps are small, you will still see the color behind it. You want to make sure they match. I have been painting all my shiplap white, so I just run the paintbrush with primer across the bottom of each row. It doesn’t have to be perfect! Add glue to the back of your leftover piece and line it up under the first row. Grab your nickels and start spacing them between the two boards. Use your level again to make sure the piece is all lined up correctly. Once you have the piece leveled and the nickels stuck in-between the bottom of the first board and top of the second board start nailing the second row into place. The nickels might fall out, make sure you are pushing the boards as close together as possible to get the right size gap. Once you get the hang of this, it’s super easy. I always had extra nickels in my pockets…once you have everything lined up nothing is worse then getting down off your ladder to get a fallen nickel.
Just continue this step until you get close to the baseboards. Always using your last leftover piece to start your next row of Shiplap. Remember measure twice or three times…cut once! 😉
Finishing Touches
When you get down to the last row, I always leave my baseboards in except for my bathroom. If the baseboards are staying up, you will need to measure the last row width. It’s highly unlikely that it will be the exact width that you have the boards at. Who knows maybe you will get lucky! Me…never! Cut the width of the boards, ideally you would do this will a table saw. Like I said, I am working on growing my tool collections, so until then I used my handy circular saw and tried to have an extremely steady hand. I normally have to sand down the side with the cut. The plywood strips are only 1/4″ deep, so it should line up nicely on top of your baseboard.
 I normally add Moulding to my Shiplap wall. It makes everything look clean, professional and finished. For my bedroom and bathroom, I used quarter round and my entryway I used 1 1/2″lattice boards to finish off all the corners of the walls.
Next is Caulking…this step makes a huge difference in the final look. I caulk the gap between the ceiling in the first row and between the last row and baseboards. This also helps to give it a finished look. I also caulk all of the nail holes. After the caulk is all dry, it’s time to get painting. I have used the same paint color for all my Shiplap walls, Benjamin Moore’s Chantilly Lace (OC-65) in Pearl Finish. It’s my favorite go to white color. It’s super bright with a cool tone. So if your a fan of cool tones, this might be your favorite Go-To white too! 
That’s it!!! You have a Shiplap Wall…Super easy, super cheap…Winning!
Be sure to Share Pics in the Comment section…if you give it a try! We would love to see your work too!
* just a note…please read all instruction manuals prior to using tools and wear proper safety equipment.

This post contains affiliate links. For more information, please see our privacy policy. Thank you!
About The Author
Jessie
Related Posts

DIY Leather Pulls with Cricut
This post is in partnership with Cricut, a company I love. All opinions here are…
June 18, 2021
Creating with Sugru
This post is sponsored with thanks to Sugru, but all thoughts and opinions like always…
December 2, 20206 COMMENTS
Leave A Comment
Jeff | 20th Oct 18
Nice article great idea about using nickles as spacers. Does Lowes charge you to rip the boards?
These rooms look great
admin | 21st Oct 18
Thanks so much! I have yet to be charged by Lowes or Home Depot, but their policy is suppose to be 2 or 3 free cuts. Beyond that, there is a “charge” for additional cuts.
Kim | 22nd Oct 18
The finished product looks awesome. I am not very handy but you make it seem very doable. When adding the nails do you need to nail into the studs?
eyeinthedetailb@gmail.com | 22nd Oct 18
Hey Kim! You actually don’t have to be too handy to do this project… I promise! Nailing anything into a stud is never a bad thing. Lol 😉 With this type of wood I don’t think it’s absolutely necessarily, seeing as it is so light, to hit all the studs as long as you are using the adhesive glue as well. Studs definitely will always add extra stability though. Good luck!!!
Mary A. | 30th Oct 18
Such a cool look and very creative! I am still at the painting stage and not nearly brave enough to do shiplapping! It’s a very clean look and I like that you use white throughout the house with such pretty accessories.
I love the look of your house. The floor in the bedroom is gorgeous, is it a kind of driftwood color? Did you stain it that color?
I wonder if you could suggest any Benjamin Moore warm white colors? I need to repaint my living room (well, whole house really, but I have to start somewhere) and I just want to go with white. Congrats on the blog!
admin. Jessie | 1st Nov 18
Thanks so much!! I love all the questions!!! 🙂
The Bedroom floors is actually Pergo flooring in Silver Oak Mist. It’s my favourite, they are wide boards which I absolutely love. Benjamin Moore paint has a few top Warm Whites. Swiss Coffee and White Dove, I prefer the White Dove, but that’s just a personal opinion. I’ve also been getting all my white paint in the Pearl finish, which really seems to make the white pop more.
Good Luck!!!
Let me know if you have any other questions!! 😉