
Modern Magnet Board
Magnets may seem super dated, but after living overseas and traveling to so many countries these magnets are some of our most prized possessions!! 🙂 Even now after being home in the states, the kids and I love picking out our favorite magnet everywhere we go. It’s a fun, easy and inexpensive tradition!!!
In our German apartment, I had my magnets proudly displayed on my circuit box…yikes! I knew once we got all settled they would need a better home, so the idea of creating the Modern Magnet  Board was born!
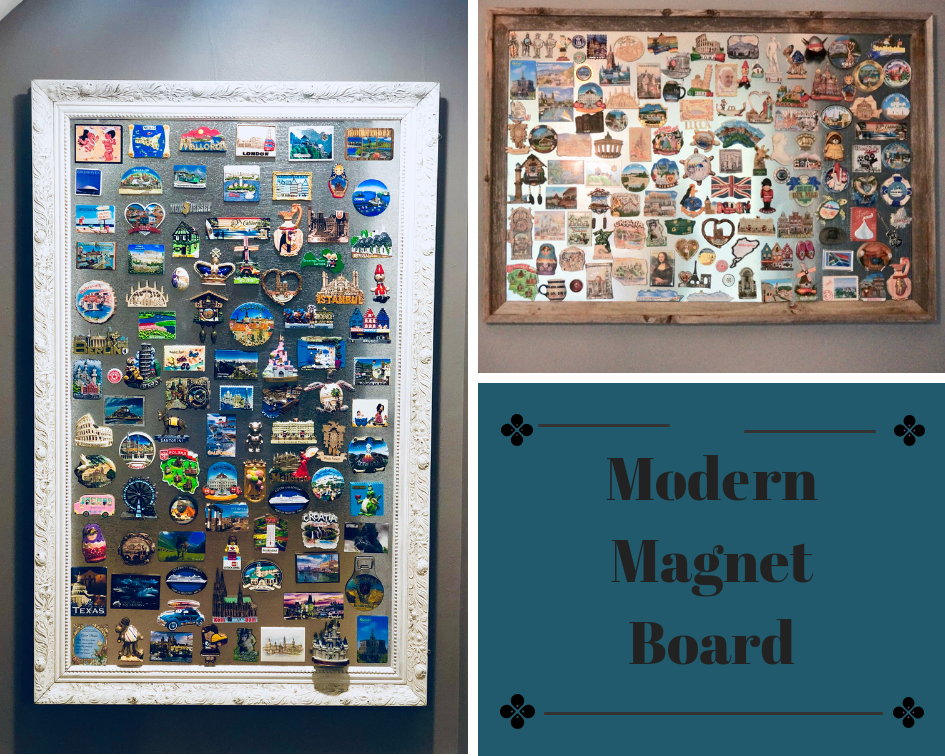
 I started off by finding this super awesome frame in a thrift shop in Germany for $10…Winning!! Of course, in all true thrift store finds, it needed lots of love and attention. I started off by painting the outside frame with my favorite chalk paint, Annie Sloan chalk paint in Old White. Next, I distressed it just a little bit with the Annie Sloan Dark Wax, using a completely dry brush, with a super light touch. Lastly, I finished it off with Annie Sloan Clear Wax. After the painting was all finished, I let it dry for at least a week so the wax would be good and dry before I put it on the wall.
After a week of drying, I removed the painting from the frame and replaced it with a piece of sheet metal. I found the sheet metal at Home Depot. Here’s a fun fact all sheet metal isn’t magnetic…Whhhaaattt??? Make sure to bring a magnet to the store to check. Getting it home and doing all the work to only to realize it doesn’t work it the WORST! Who would do such a thing? 😉
 My sheet metal didn’t fit my frame perfectly, but it was fairly easy to cut with utility scissors. That metal is super, super sharp so watch your fingers and especially any little fingers if your kids are anything like mine and always want to participate in your projects. I added two ring hooks to the back so it would hang nicely on the wall. TIP: Always use a level when hanging, no one wants tons of extra holes in their walls!
Magnet Board Option 2 from Jen….
Magnets are also one of my many collectibles from all the amazing places I have been lucky enough to visit over the years.  My family has accumulated more than a refrigerators worth of magnets so I also needed a magnet board when we came back from overseas. I created mine with supplies that were already pre-cut so all I really had to do was put all the pieces together and add magnets. Super easy!!! I bought an open frame from Hobby Lobby, Barnwood Open Frame – 24″x36″, and a piece of pre-cut sheet metal from Home Depot to fit the frame (24″x36″). Also, I second the tip to bring a magnet to the store with you when buying the sheet metal. I may have come home with non-magnetic sheet metal before!!!
The sheet metal was 24″x 36″ so it fit my frame perfectly, no need to use any scissors. Next, I put the sheet metal into the frame and put a piece of cardboard behind for stability. I went back and forth on what to use to hold it into place, but settled on mirror hanging clips to hold the cardboard backing into place along with small nails all around the edges. Lastly, add all the amazing magnets!!! This magnet board has become one of my favorite things in my house…I love to look at it and remember all the amazing trips we took over the years!!!
This post contains affiliate links. For more information, please see our privacy policy. Thank you!
About The Author
Jessie
Related Posts

Flooring Transformation with Novocore Flooring
This post is in partnership with Novocore Flooring, a brand & company I love. All opinions…
May 22, 2022
DIY Leather Pulls with Cricut
This post is in partnership with Cricut, a company I love. All opinions here are…
June 18, 20213 COMMENTS
Leave A Comment
Kathleen Dellaquila | 30th Sep 18
Absolutely amazing! Such talent; best of luck!
Jeannine Dean | 21st Oct 18
I love the magnetic frames. I have been looking for something to do with all of mine. It has become a tradition with my brother, sister and me. You are so talented… what do you think of doing shiplap for a kitchen backsplash?
admin | 21st Oct 18
Such a fun tradition! You should totally make one! You should no by now that I am never oppesed to Shiplap…anywhere! I’ve seen it a few times & it looks really nice in white. I’ll send you a picture! xo