
DIY Bicycle Wreath
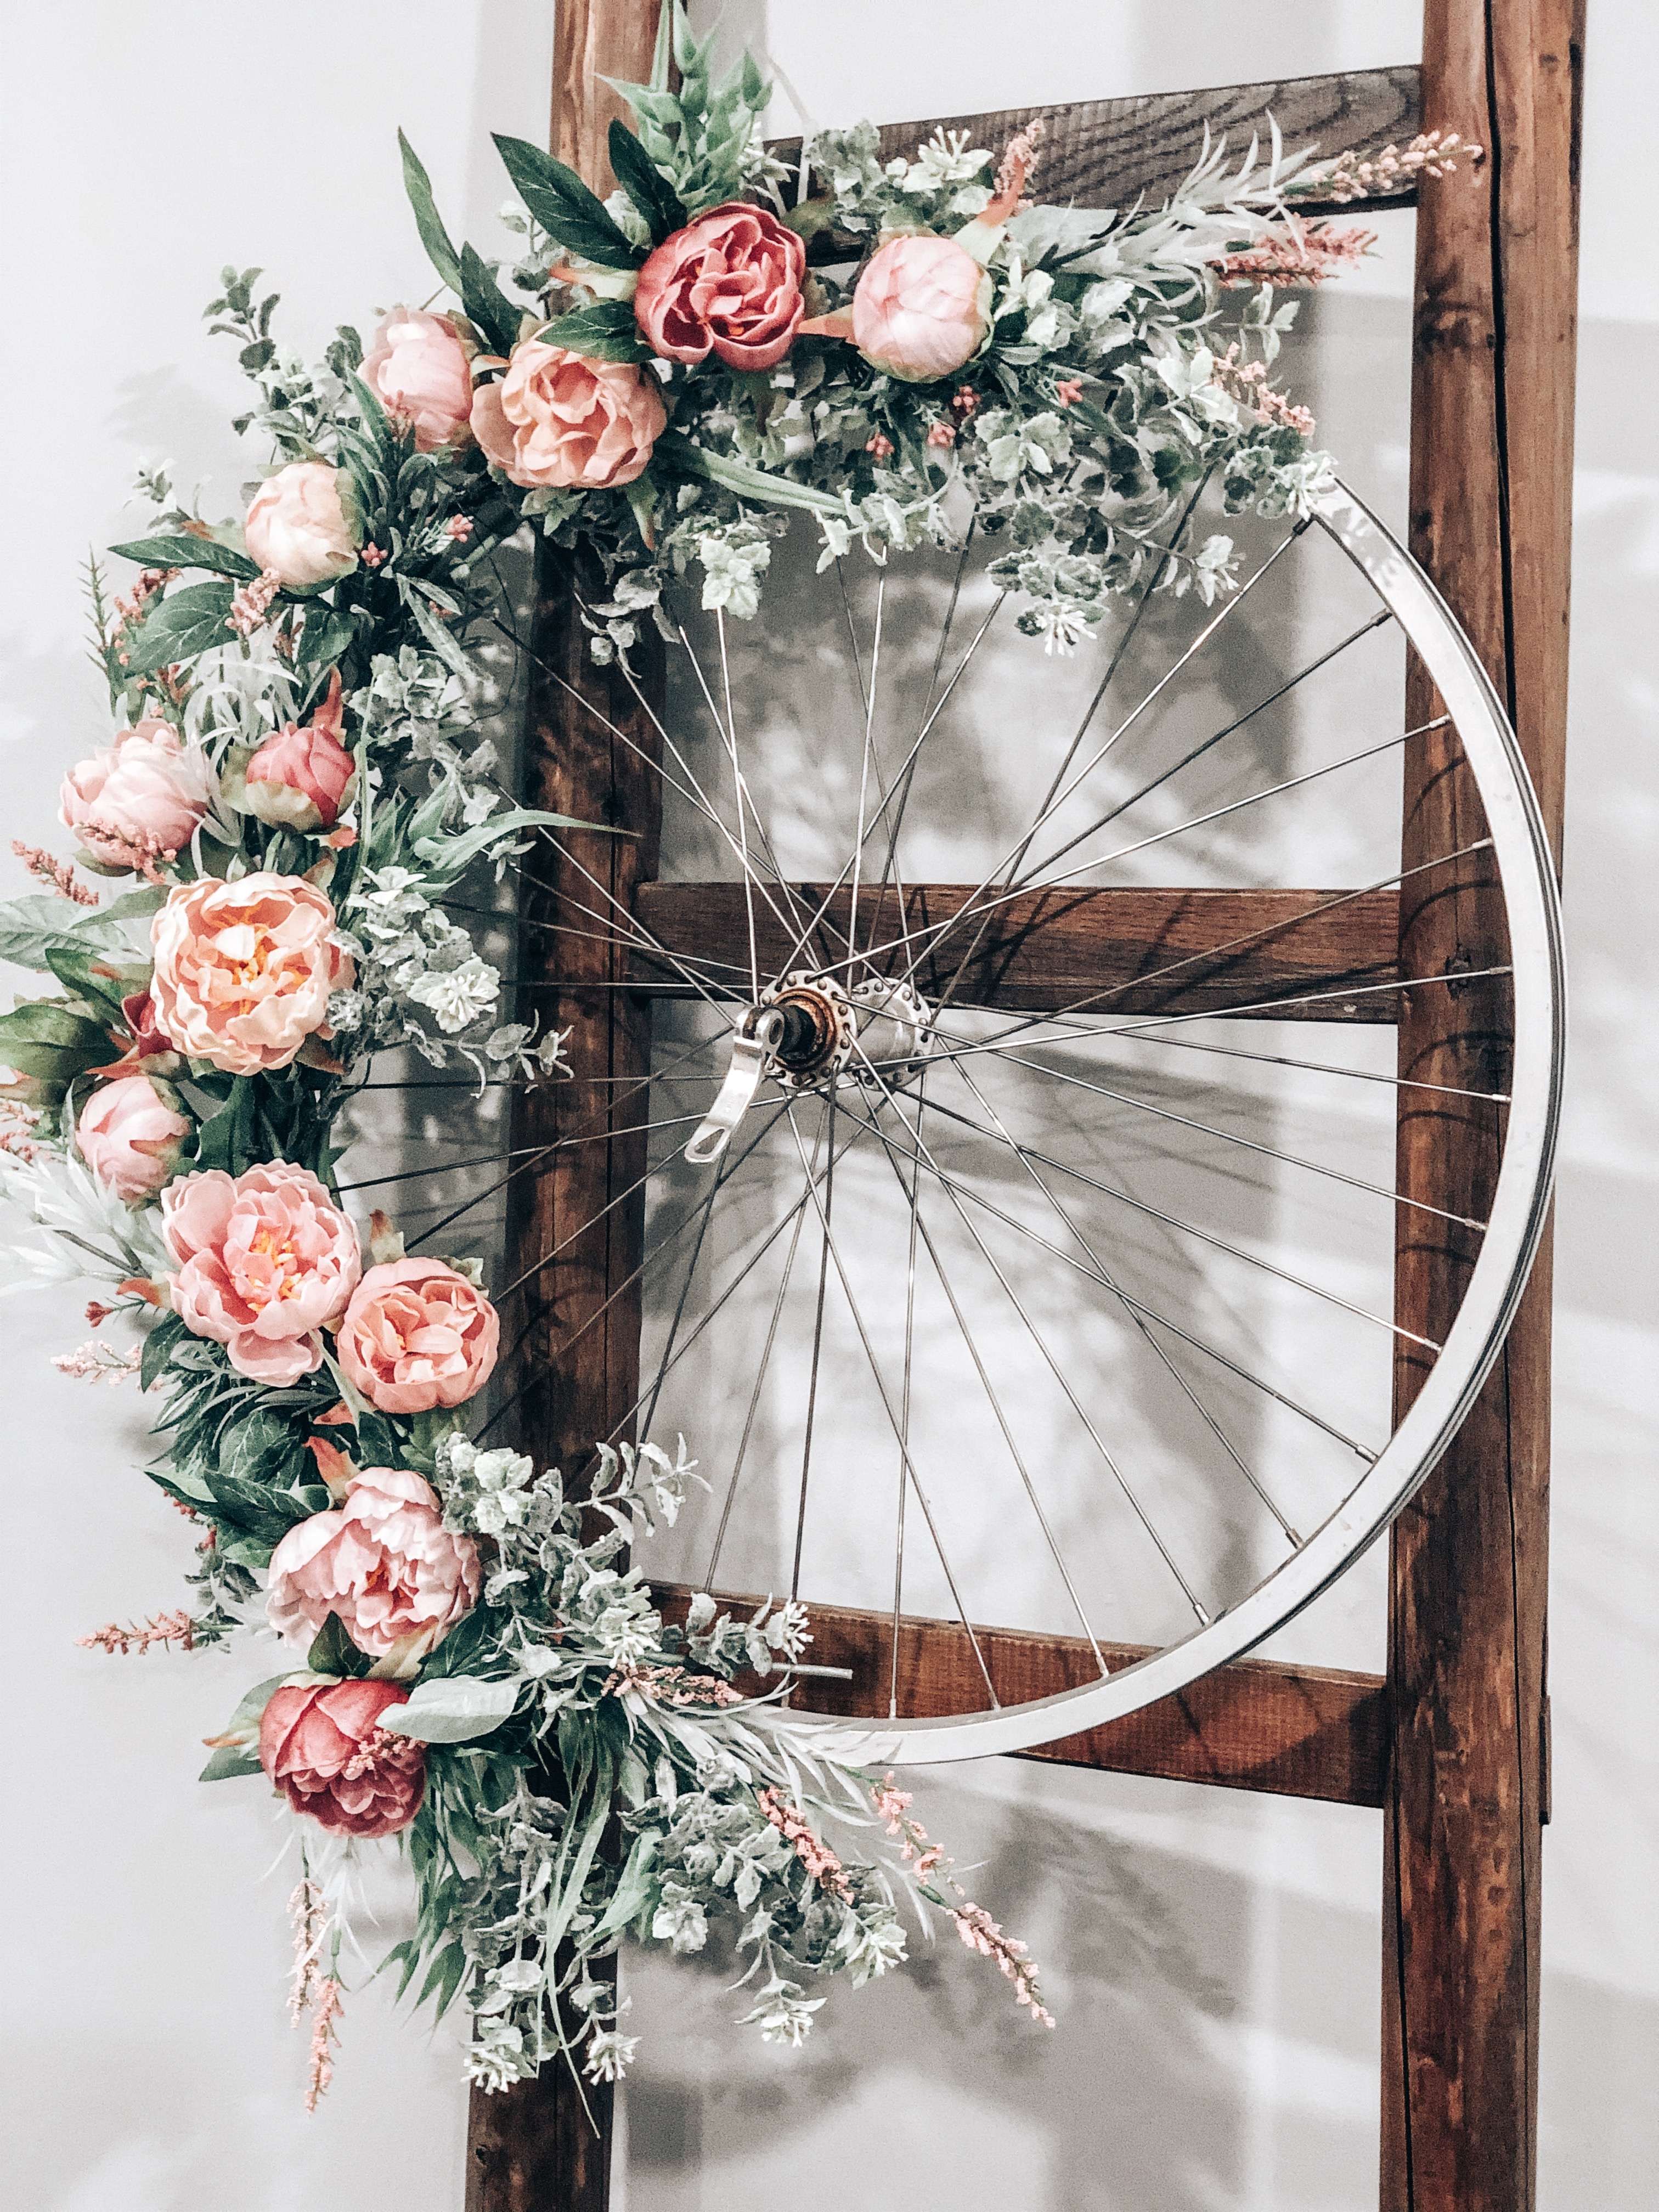
How beautiful is this DIY Bicycle Wreath!!! This wheel was stashed in my hoarders garage that I have been cleaning out and organizing for the last week, it’s been pretty daunting for the most part but, every once in a while I would find a treasure in my chaotic clutter. Like, this amazing vintage bicycle wheel.
I know what your thinking, a bicycle wheel is that really a treasure? Well, I would absolutely say YES! I found this bicycle wheel at a random vintage shop that caught my eye while driving. Can we say U-Turn…I knew as soon as I saw it what I wanted to do with it. Of course I have big plans for where this guy is going to end up, which is going to turn into a whole other giant project. So, for now I am going to share with you my simple and easy DIY Bicycle Wreath tutorial.

DIY Bicycle Wreath
Supplies:
- Metal bicycle wheel
- Florals
- Greenery stems
- Wire cutters
- Green floral wire
Step 1: Grab all of your supplies. Come up with a plan on what you want your wreath to look like. I choose to decorate a little more then half of my wheel. Lay out your greenery and florals to get a good idea on what you want your final product to look like.
Step 2: Always start with the large greenery. Lay it all out and then cut the stems to your desired length.
Step 3: When you have your greenery in the position you desire, cut your floral wire into strips about 8″ long. Start wrapping your wire around the bottom of your stems going around your wheel very tightly. I normally go around once and then start wrapping each end of the wire in opposite directions.
Step 4: After your greenery is completely secure it’s time to start adding your florals. For this wreath, I grouped my florals into 3’s. I picked 3 different florals of shape and color and started picking the location for them. Normally I start my first grouping of florals in the center of my wreath and then work my way up and then down.
Step 5: Start wrapping your florals into place by their stems. Same as the greenery, using strips of floral wire. In some locations I was able to stick the florals through the same wiring as the greenery. When securing your florals keep in mind their location trying to cover all of your wiring.
Step 6: After the florals are all secure it’s time to add the smaller greenery as your filler. Any spot that looks a little bare or spots you need help camouflaging your wires are a great spot to add the fillers. For the extra fillers, I normally don’t add any additional wiring. I always find a wire or stem to stick in through. You can also use a hot glue gun for this step if you prefer.
Step 7: Step back and examine your work. See where you might need to add more florals or greenery.
That’s it!!! Now enjoy your beautiful creation!!
Here’s also a quick video tutorial to help as well!

Feel free to Pin!

We would love to see your finished project! Just comment below and be sure to check out our Facebook page and Instagram as well.
Happy DIYing!

Related Products:
This post contains affiliate links. As always, all opinions are our own. Shopping affiliated links helps support our small brand at no additional cost to you, we appreciate the love. For more information, please see our privacy policy. Thank you!
About The Author
Jessie
Related Posts

DIY Leather Pulls with Cricut
This post is in partnership with Cricut, a company I love. All opinions here are…
June 18, 2021
Creating with Sugru
This post is sponsored with thanks to Sugru, but all thoughts and opinions like always…
December 2, 2020