
DIY Wall Calendar with LetsPlott
Who’s ready to see something super cool? Are you ready for your DIY projects to get a little easier and as a bonus without any math? Umm…yes, please! I was just introduced to the Cubit by Lets Plott. This little magic tape measure does so many things.

Paired up with your smart phone, the Cubit can offer you augmented reality and a design center. It allows you to design different options in your own space, giving you a great visual of what the outcome of your project will look like. Now, this is my favorite part, it is also offers multiple measuring options. It has a dual laser that can measure as far as 65ft. For any irregular shapes, it offers a measuring wheel underneath that can glide along any surface.
So, basically the coolest tape measure ever…This is perfect for people like me that are a one woman show. I can get a measurement so easy, with just a point of a laser. Getting measurements with my tape measure can be so challenging by myself. It always falls or breaks in the middle, making larger measurement so difficult. This tool takes all those obstacles out of the equation.
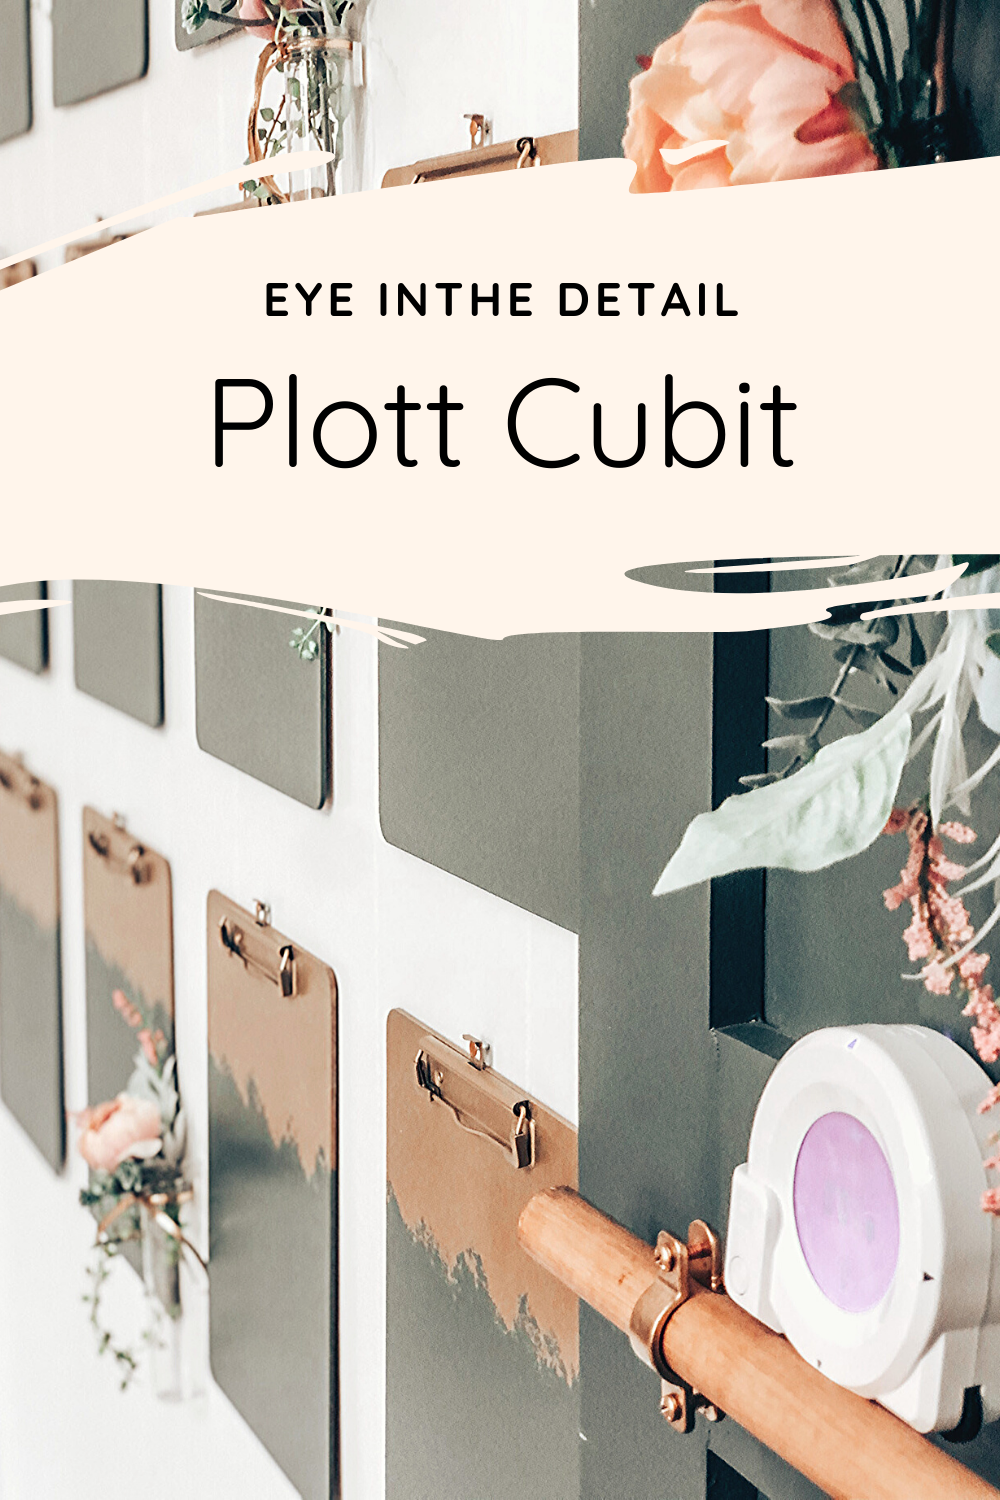
Alright…let’s see what we can do with this guy. For my project, I am going to make a DIY Wall Calendar. Lately, I have been getting so busy and I really could use a good Calendar system. I am desperate to see more than just one month at a time. With everything going on, I kind of need to see the whole year at once to keep me on task. I am going to be hanging 12 Clipboards, one for each month. This project would normally require so much math and so many measurements.

Here’s a good idea of how much math you end up needing to get your project perfectly spaced out…Yikes!! Did you give up already??

With Cubit‘s Augmented Reality, I am going to be able to see my project come to life by showing me different design plans without hammering one hole in my wall. Using Cubit, along with their app I can see my own space with the item that I want to add. I’m sure if you have ever tried to make a gallery wall, you know it can get very overwhelming and often people give up or end up with a swiss cheese wall. So, let me show how the Cubit along with your smart device can save you and your wall lots of time and unnecessary holes.

These are the two design options I was choosing between. I loved that the app allowed me to move my items all around, switching up the space and really getting a clear idea what it would look like in the end. This would be really helpful when creating gallery walls.

In the end, I went with the second design option. With 3 rows of 4 clipboards. Once in the app, you are going to start off by naming your project.

Next, you pick how you want to do your project. I choose Photo.

You are going to first take a picture of your item…mine was the clipboard.

This is what it looked like so I can see it in AR. Next, you take the measurements of your wall. You are going to locate the bullseye on 3 out of 4 of your points on the wall. It will scan the floor surface first, once it turns green you are good to start with your first point.

Now, comes the fun part. You get to design your space the way you want to. Try different arrangements and looks without having to actually commit or make any holes into your wall. Once you decide on the positioning you are going to connect your Cubit through bluetooth. The Cubit will act as GPS locating all of the hanging points along the wall. Letsplott has a great tutorial here too. After I found all my hanging points, I went ahead and nailed my 12 nails into the wall. One for each clipboard.


The calendar ended up looking so good and perfectly placed on my wall. I am so excited to add this organizational space to my home. It’s functional and beautiful…my favorite combo! I also have this entire project saved under my highlight bubble here on Instagram. You can see the whole projects process and how to as well.

Jessie
Related Products:
This post contains affiliate links. As always, all opinions are our own. Shopping affiliated links helps support our small brand at no additional cost to you, we appreciate the love. For more information, please see our privacy policy. Thank you!
About The Author
Jessie
Related Posts

Flooring Transformation with Novocore Flooring
This post is in partnership with Novocore Flooring, a brand & company I love. All…
May 22, 2022
DIY Leather Pulls with Cricut
This post is in partnership with Cricut, a company I love. All opinions here are…
June 18, 2021