
DIY Storage Bins
Umm…so things are super weird right now, Obviously!!! Do you need a distraction? I sure do…Why not do something productive and fun with all of our extra time at home. Who is with me and thinks we should start building things? I was so excited to be invited by Sam @Diyhuntress and Jen @Jenwoodhome, to participate in their #buildathome with a bunch of amazing makers. The challenge is super simple. Stay home, use scrap wood you already have on hand, get creative and start building…Challenge accepted ladies!!
I have tons of scrap wood just laying around my shop waiting to be used and really needing to be cleaned up..Lol! Since I am not going anywhere for quite sometime it seems, I wanted to be smart with my build and really make something I need. I have been working on custom built-ins in my entryway for the last two months. Ekkkkkk…I said it, two months! To finish that space I could really use storage bins. Originally, I had my eye on these amazing baskets I found online, but hey why not try making something first.
Here is where I am at with the built-ins. My plan is to build two storage bins for each shelf. The shelves are super high, so I want to store things that I only need to get down a few times a year. I went with bigger bins so I could really maximize my storage space. I mean..that was the whole point of making this space and knocking down walls. Right?
DIY Storage Bins

Supplies:
- 1 x 2’s
- 1/4″Plywood
- Trim of choice
- Cane Webbing
- Hardware
- Felt Pads
Tools:
- Miter Saw
- Table Saw
- Drill
- Nail Gun
- Wood Glue
- Kreg Jig & Screws (optional)
- Stapler
- Corner Clamp
Steps:
- Measure and determine the size you desire your bins to be. My bins will be 27″x 21″x 10″

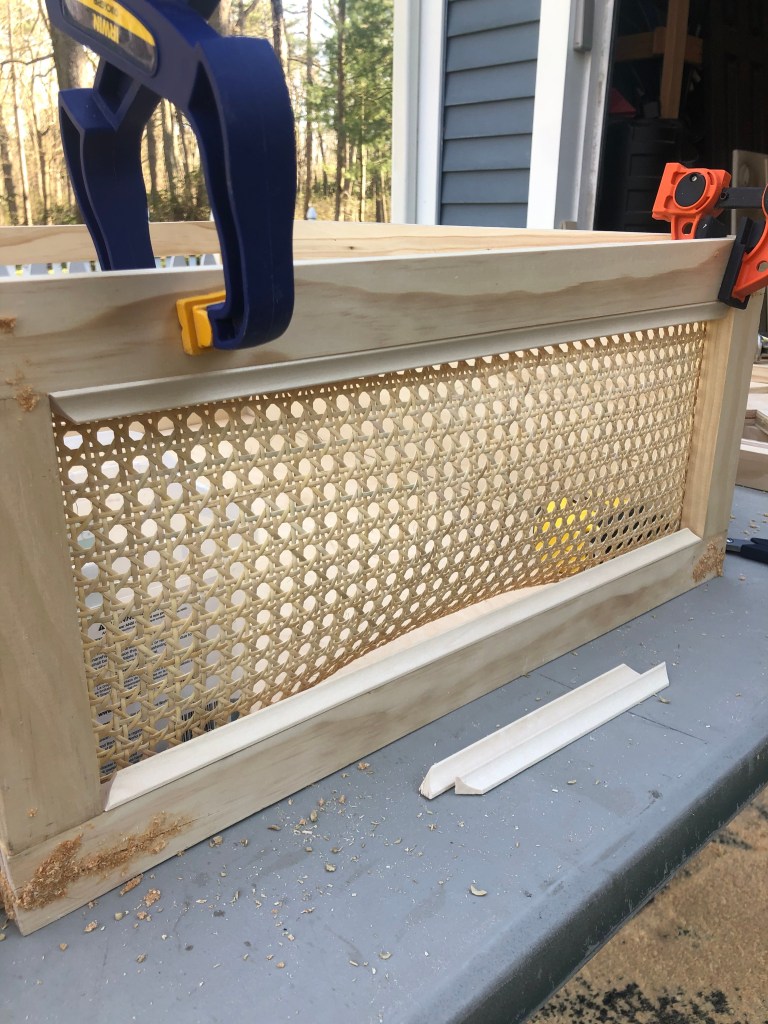
- I made the front and back pieces first using my 1 x 2’s. Measure the top, bottom and the side pieces. Then glue and pocket screw them all together making a rectangle for the front and back frame.

- The side pieces…cut your plywood to length and height for your space. Mine is 25.5″X 10″, I added a 1 x 2 going across the top and bottom full length. Then I wood glued it to the plywood and added three brad nails to each piece.

- On all 4 pieces I made a dado across the bottom to slide the bottom piece of plywood using my table saw. I don’t have a router for this step, so my table saw worked perfectly to make the dado. I had to run each piece of wood through twice, moving my blade over once. A dado is nothing more than a square-grooved slot on one board where another board will fit. Very similar to tongue and groove joinery.

- I connected the back piece with one side piece at a time. I used my corner clamp to get them squared and made sure my dado grooves were all lined up perfectly across the bottom. Then used my nailer and nailed them together in both corners where the 1 x 2’s lined up.
- Once I had all three sides together. I measured my bottom 1/4″ plywood piece and cut to size. Then slid the bottom piece into the three sides.
- The front piece notched into the bottom. Once again, I used my corner clamp and nailed the front pieces to both side pieces across the top and bottom corners.
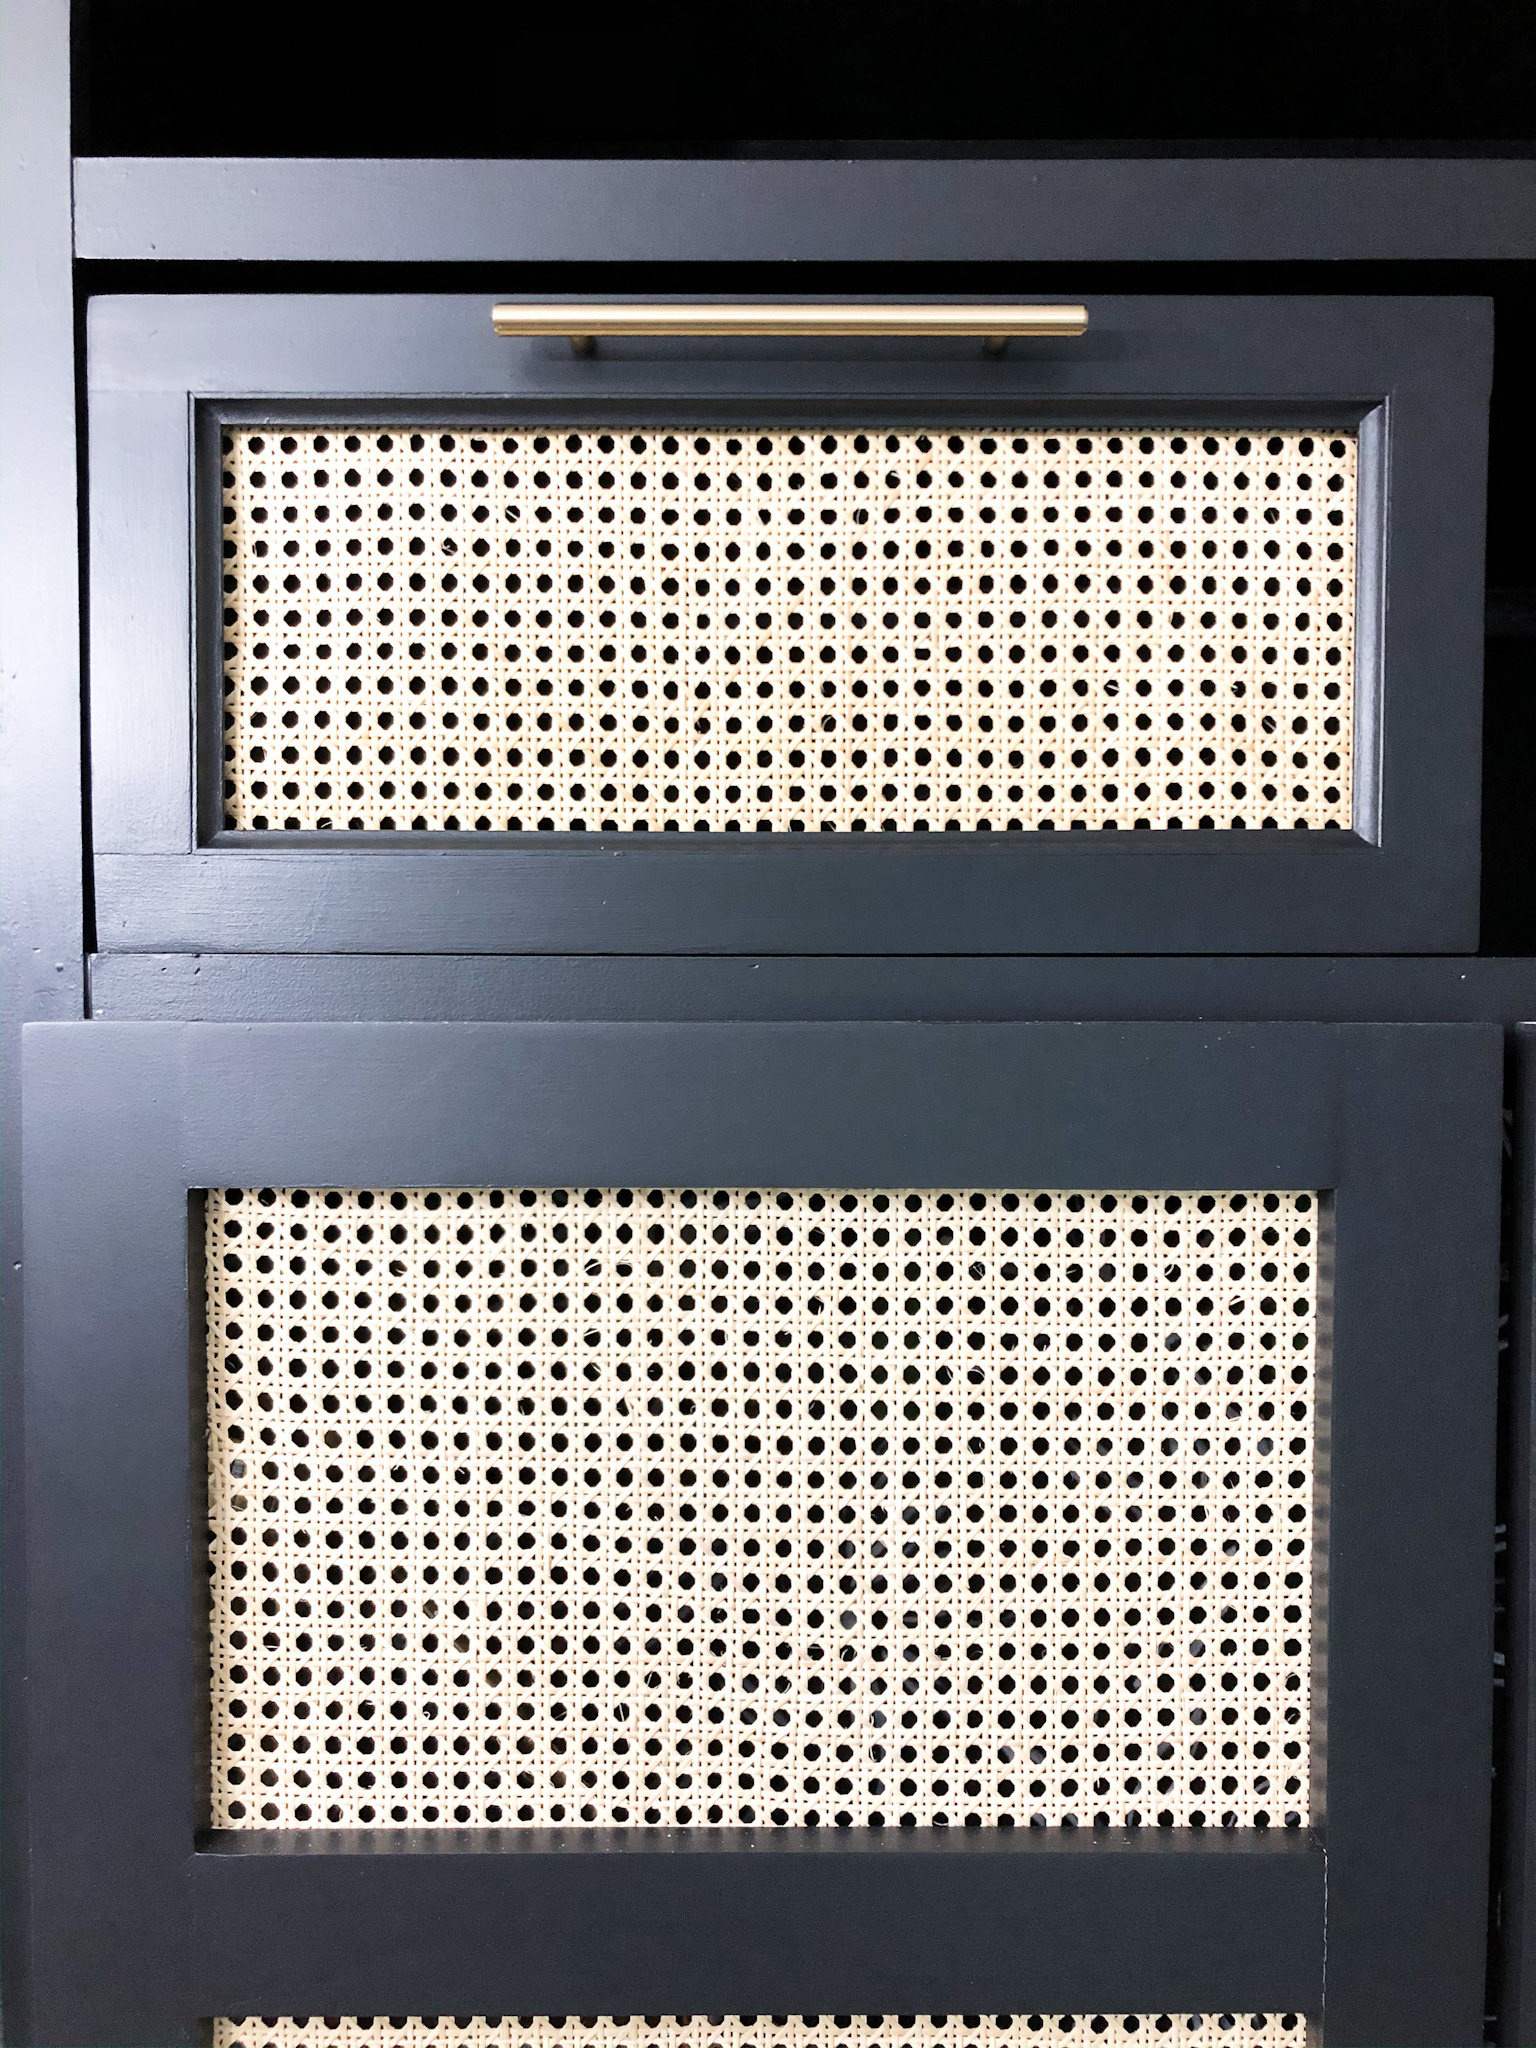
- On the front piece, I added trim pieces to make it a little more detailed.

- Time to get that wood filler out and fill in any nail holes or gaps.
- Then sand after the wood filler is completely dry.

- Prime and Paint. Sand using 220 between each coat to get a smooth finish. One coat of primer and two coats of paint.

- Add the canning webbing next. Cut to size. Cane webbing needs to soak in water for two hours before you can add it to your project. It shrinks slightly so have that in mind when cutting your piece.
- After it has soaked for two hours pull it out and you actually work with it wet. It stretches better and lays nice and flat when it is wet and soaked. I stapled this to the back of my front piece

- I added a hardware handle so it would be easier to grab and get down. The side 1 x 2’s also work as a great way to handle the bin.

- Last step…I added felt pads to the bottom so it would slide better and not scratch my surface.
Whew…okay that’s it! You now have a custom storage bin. I made four of these completely finishing up my custom built-ins!

Don’t miss out on all the other makers projects! Click on their names to head over to their blogs and see what they all came up with!
Sam @diyhuntress | Jen @Jenwoodhouse | Brandon @walkers_woodworks | Jamie @jamiecostiglio | Katie @addicted2diy.com | Sarah @uglyducklingdiy | Elisha @pneumaticaddict | Ethan @thebuildwithethan | Adam @lazyguydiy | Billy @genealogistwoodworker | Tamar @3X3custom | Anika @anikasdiylife | Jesse @penaltyboxwoodshop | Charlotte @atcharlotteshouse | Chris @cowdogcraftworks | Cara @neverskipbrunch
Hope you joined in building these last few weeks! I love seeing all your projects… keep sharing using the hashtag #buildathome so we can continue to see them all!!!

Jessie
Related Products:
This post contains affiliate links. As always, all opinions are our own. Shopping affiliated links helps support our small brand at no additional cost to you, we appreciate the love. For more information, please see our privacy policy. Thank you!
About The Author
Jessie
Related Posts

Flooring Transformation with Novocore Flooring
This post is in partnership with Novocore Flooring, a brand & company I love. All opinions…
May 22, 2022
Impact of Interior Doors
This post is in partnership with The Home Depot, a brand & company I love. All…
August 17, 20212 COMMENTS
Leave A Comment
Mary Robinson | 10th Apr 20
Where did you get your caning from?
TRACEY HARTZLER | 10th Apr 20
Looks really great Jessie! Loved watching the whole process
🙂