
$50 Mantle Makeover

I keep getting lots of requests to come to peoples homes and decorate for them. This week, I decided to bombard my sweet and amazing friend/neighbor Tori’s house. Ready or Not…here I come! Tori has an amazing house with so much potential and like most stories I hear she doesn’t have the time or vision to start the decorating process. Decorating the whole house is very overwhelming. I totally get that!
Lets start small…mantles and fireplaces are a great place to start decorating in a home.  Normally, they are a great focal point in a high traffic room. Aka, great spot for everyone to notice. Once you have your fireplace and mantle decorated, I believe it’s easier to continue the flow of the rest of the room or even house.
Tori and I decided on a $50 budget for a few new things for our Mantle Makeover. I wanted a small budget, to show that you don’t always need a ton of money to improve the look or update an area in your house. Also, to show that I am totally a Miracle Worker! 😉
$50 bucks for a whole new look…lets get started! To make this really work I needed to be scrappy with that $50 dollars. Let’s be serious, no one will ever tell you I’m known for my bargaining skills.
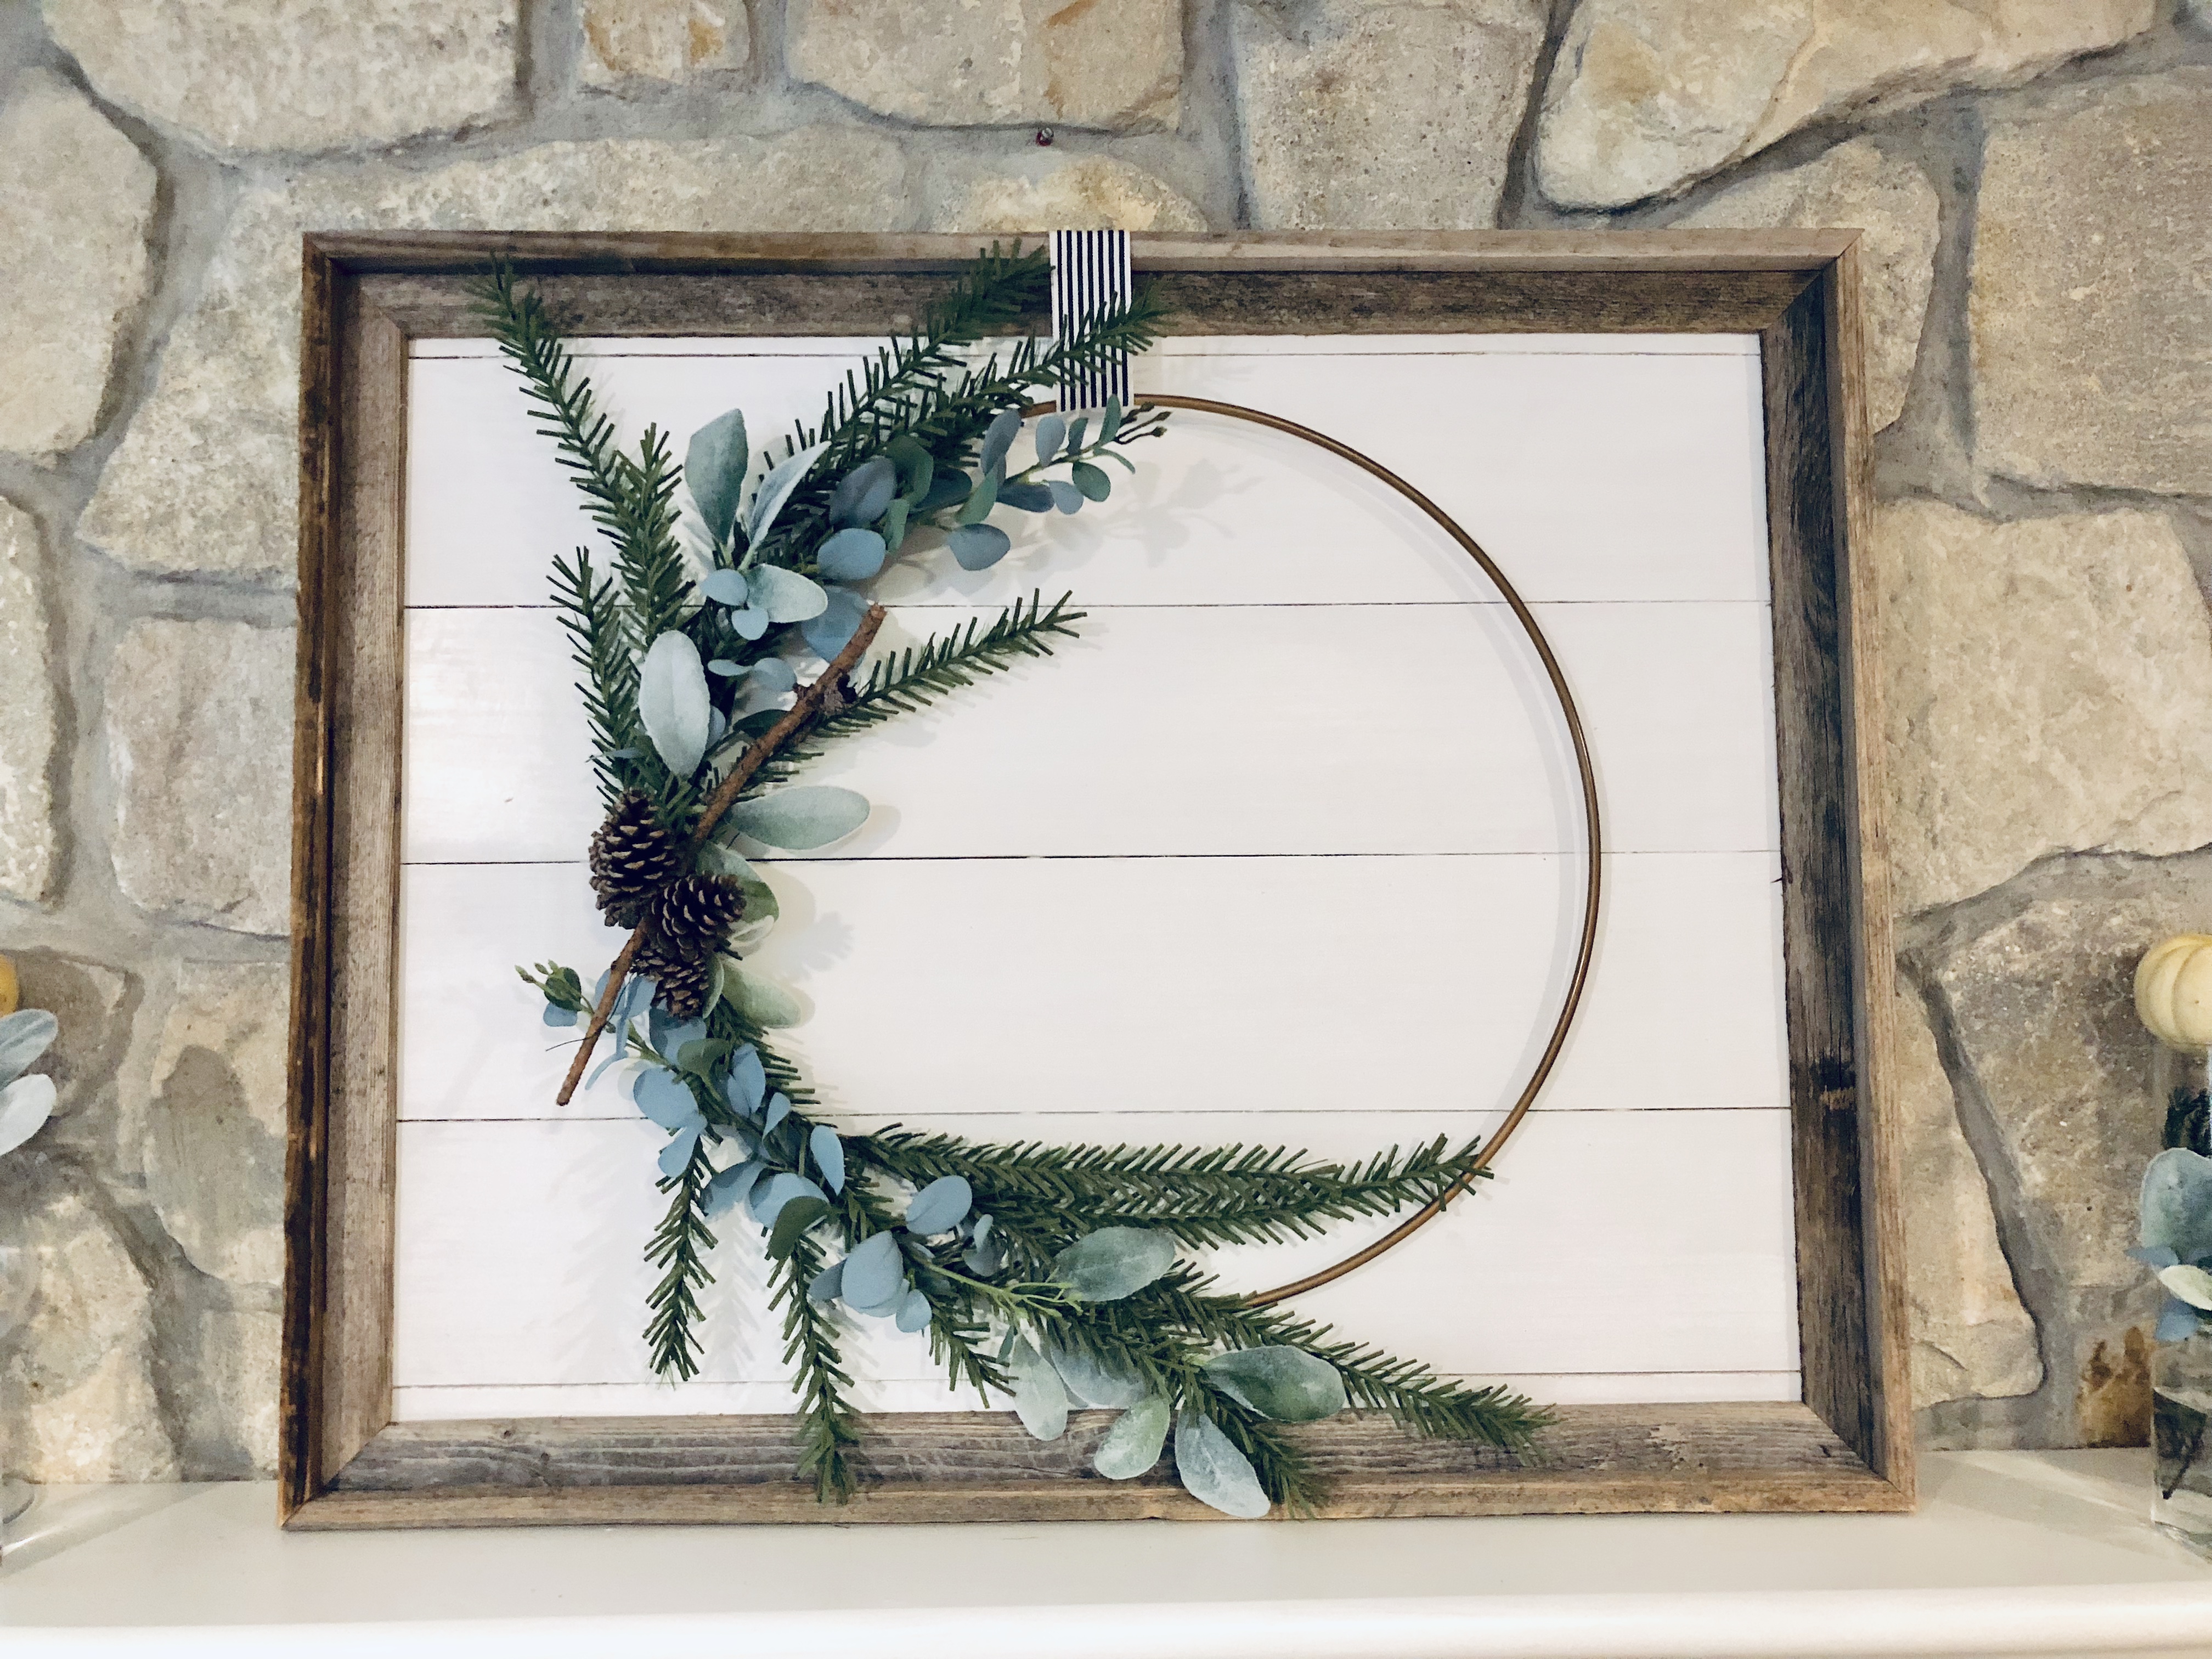
I wanted something large in the middle of the mantle, the main focal point of the whole fireplace. I had an amazing idea for a framed Shiplap piece. It just so happens I did a big post on how to do your own Shiplap and kept thinking of all my wonderful Army friends who are living in homes that are temporary, which I have done more times then anyone would ever want to imagine. So many of them wanted to do the Shiplap walls, but couldn’t. I felt like a large Shiplap Wall piece would be the best of both worlds. Problem solved…Shiplap for ALL! This piece cost me a little over half of my budget and that’s even with me making the whole thing. It turned out so great though…I think I might need to make another one for my own house. Tutorial to come of Framed Shiplap Decor.

If you read my Tips for Staging Post, you know I always add something Green and that I love to place things in 3’s. I had greenery left over from my Wreath that I made for my main focal point. I also, purchased 6 mini white pumpkins, these are one of my favorite Go-To fall decor items. My other purchases included a clearance Lantern,  that was in pieces so I just put back together. I also, found a large Letter Y
  in the clearance section of Hobby Lobby. Winning!!! There it is…..my $50; wood, frame, greenery, wreath supplies, pumpkins,
  lantern and decorative letter.
After, I got all my supplies I was ready to start decorating. I always clear my space and start with a blank canvas. Next, I looked all around Tori’s house for additional pieces I might want to use. I started with my Focal Point (Shiplap Wreath) and worked my way outward. When I was all done, I still felt like something was missing so outside I went and started cutting down branches for more greenery. I think that is the only upside to living in the woods, lots of greenery to chose from. So, heres our finished product…Remember, small small budget. You don’t always need a ton of money to spruce things up. Move things around, have an outsiders perspective, add seasonal decor, get creative and make something one of a kind! 😉
Ready to see the Magic?

Finished room- I moved the furniture around a little too! 😉 If we had a bigger budget, next thing to add would be more pillows and throws.

Thanks Tori & Fam for letting me take over!!
This post contains affiliate links. For more information, please see our privacy policy. Thank you!
About The Author
Jessie
Related Posts

Let’s Refresh for Spring!!
Can you believe it?? Spring is here…and we all survived another Winter, some of…
March 20, 2019
The Power of the Pillow ~ DIY 10 Minute Pillow Tutorial
Life changing topics on our blog today…Pillow Talk…LOL! So if you haven’t…
February 27, 20196 COMMENTS
Leave A Comment
Jeff | 30th Oct 18
Nice job Jess
admin | 30th Oct 18
Thanks so much!! 😉
B J LESTER | 30th Oct 18
Jessie, so proud of you.
admin | 31st Oct 18
Thanks so much BJ!! Xoxo
Jeannine | 31st Oct 18
You are so gifted. Thanks for sharing
admin | 1st Nov 18
Thank you so much lady!! That is so sweet of you to say! xo